How to Implement RBAC (Role-Based Access Control) in Supabase
- Share:
Introduction
Role-based access Control (RBAC) is an access control model that can greatly simplify permission management in your application. It organizes permissions around roles rather than individual users, providing a structured approach to managing and restricting access to resources within an organization or application.
Supabase is an open-source alternative to Firebase that simplifies backend development for web and mobile. Implementing RBAC into Supabase is easily possible both via the authentication layer and directly through the database service using its native extensibility feature.
To help you Implement RBAC into Supabase in an efficient and scalable way, we’ll use Permit.io, an end-to-end solution for managing user roles and permissions with a simple, intuitive UI. We’ll create a simple TODO application with CRUD operations, use Supabase for authentication, and create a basic RBAC model for authorization using Permit.io.
Let's begin!
Setup a basic Supabase project
To get started, let's create a new React project. To save time (and assuming you understand React basics), we already have a starter project set up where you'll find the simple to-do app we’ll be using in this tutorial.
- Make sure you have Node.js and npm installed on your machine. You can download them from the official Node.js website: https://nodejs.org/en/
- Open a terminal window and create a new React project using the following command:
git clone <https://github.com/permitio/permit-supabase-example>This will create a new React project with the default settings.
3. After creating the project, navigate to the project directory by running:
cd supabase-permit-starter4. Next, we'll install the required dependencies by running:
npm install5. Now create a .env file in the directory to store the secret keys for our projects. It should look something like this:
VITE_SUPABASE_KEY="your SUPABASE KEY"

VITE_SUPABASE_URL="your SUPBASE URL"
With our project setup done, we’ll now add our database using Supabase:
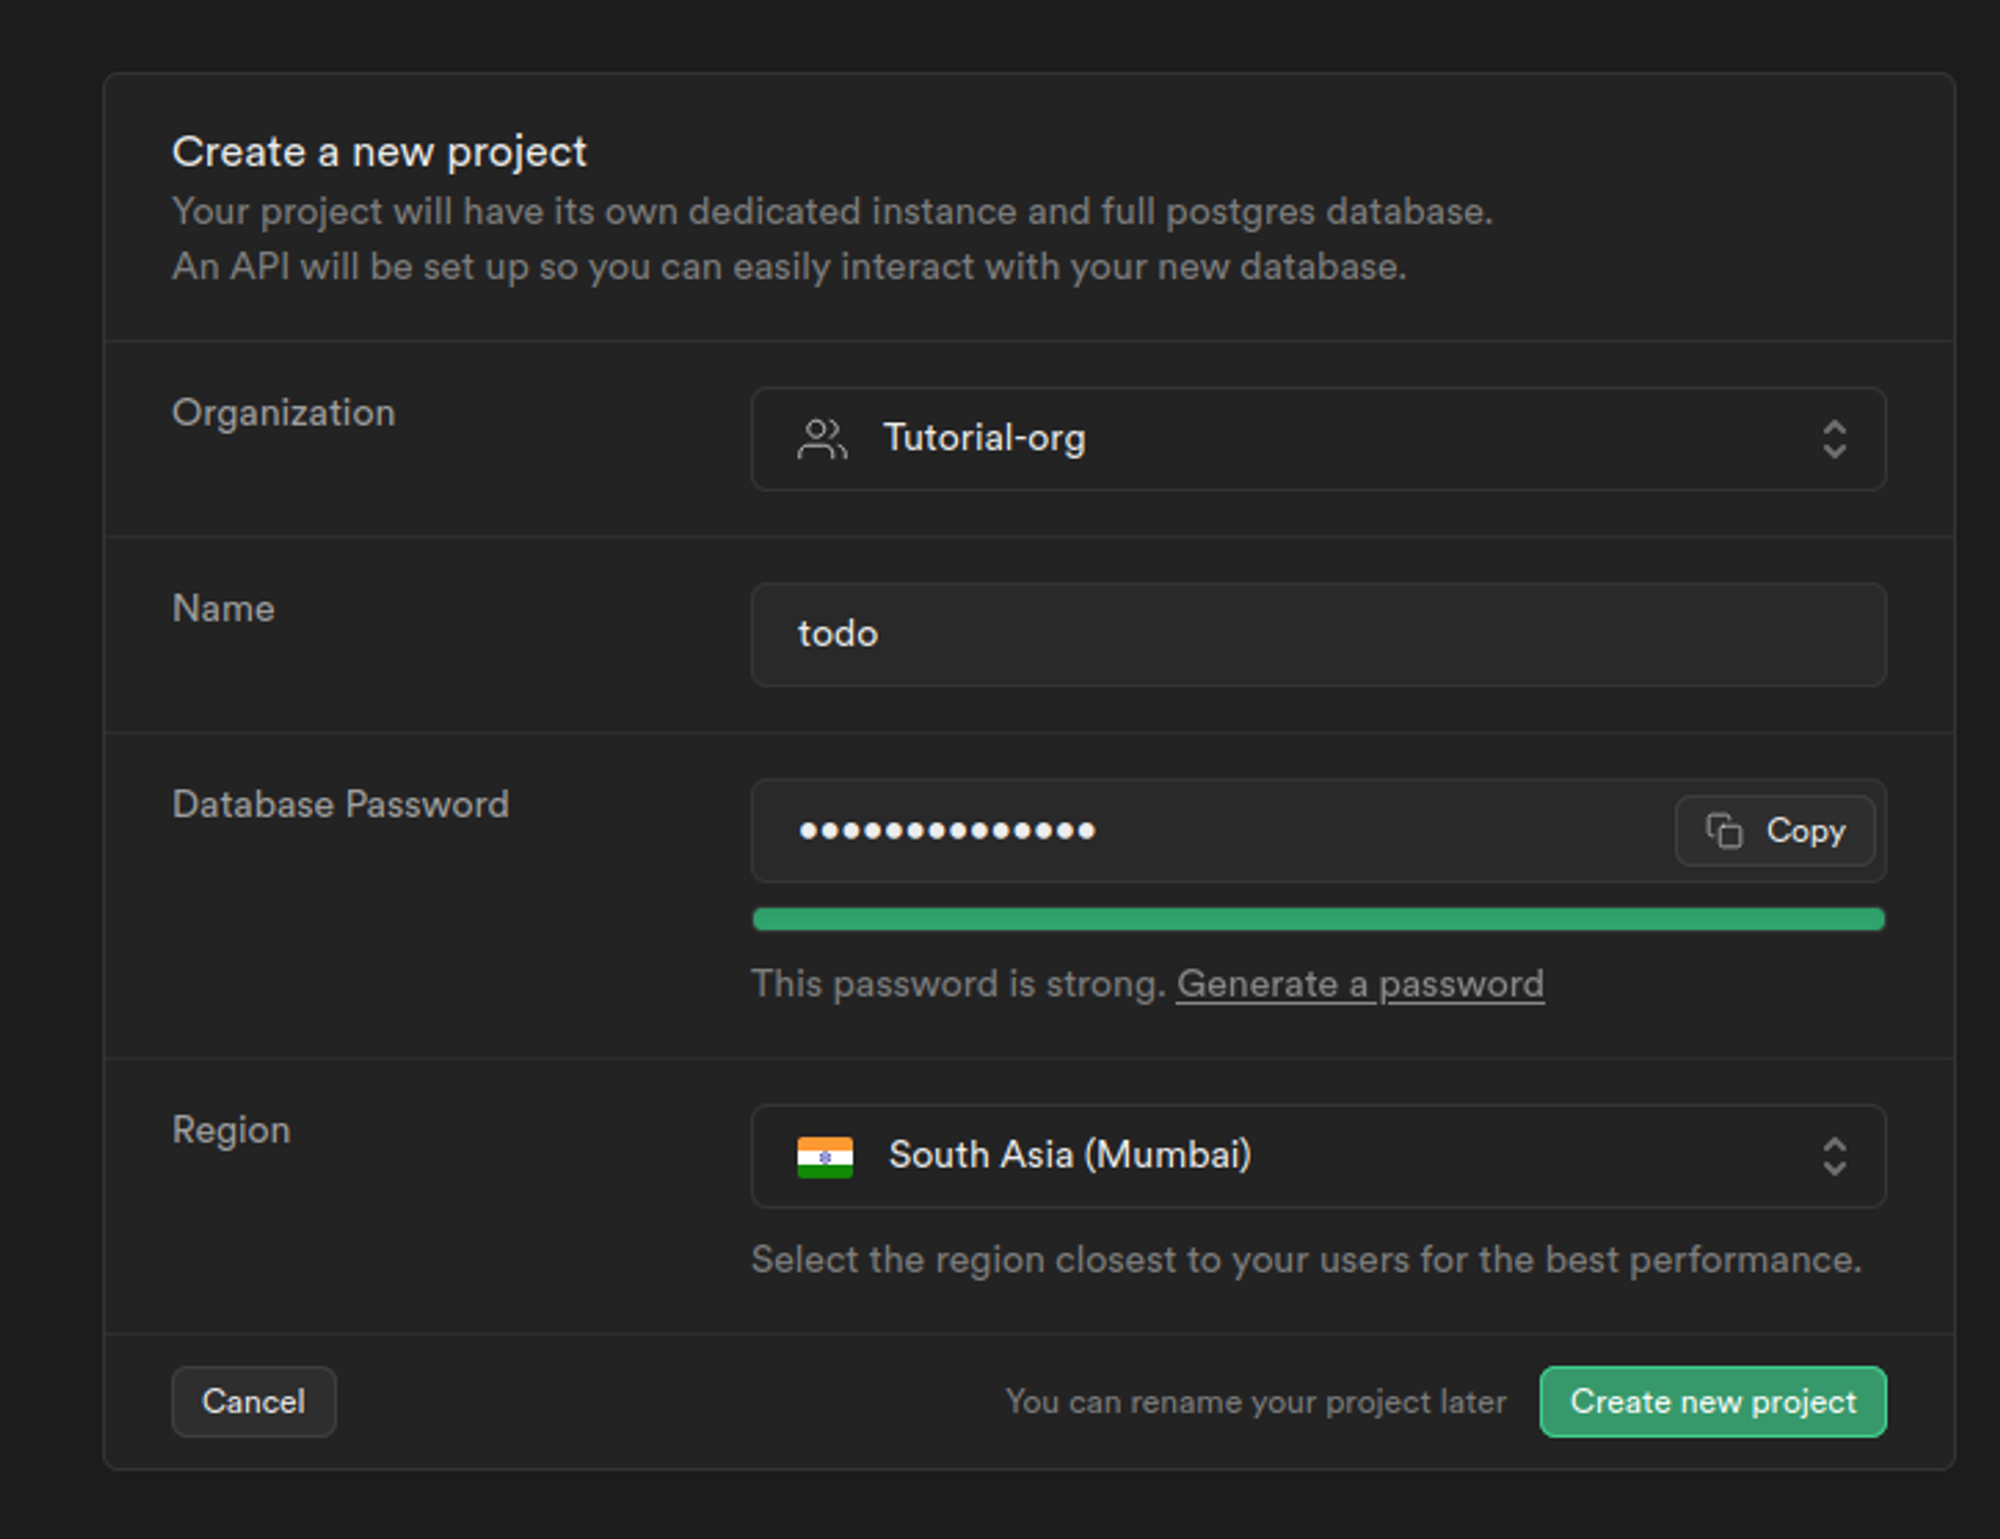
1. Go to the dashboard section on Supabase and click on the new project button to create a new project, enter an organization and a project name of your choice. For this tutorial, we are keeping the name of the project as todo-app

2. Fill in the details as shown below, click on the create new project button, and wait for the project to setup:
3. Next, let’s build a schema for our project, select SQL editor from the project’s dashboard:

4. Click on new query option and fill in the query given below :
#Create atablefor public profiles
createtable profiles (
	id uuidreferences auth.usersondelete cascadenotnullprimary key,
	updated_at timestampwith time zone,
	email tex
	t
);
#Set up Row Level Security (RLS)
# See <https://supabase.com/docs/guides/auth/row-level-security>for more details

altertable profiles
	enable row level security;

create policy "Public profiles are viewable by everyone."on profiles
forselectusing (true);

create policy "Users can insert their own profile."on profiles
forinsertwithcheck ((select auth.uid()) = id);

create policy "Users can update own profile."on profiles
forupdateusing ((select auth.uid()) = id);

#Thistrigger automatically creates a profile entrywhen anewuser signs up via Supabase Auth.
#See <https://supabase.com/docs/guides/auth/managing-user-data#using-triggers>for more details.

createfunction public.handle_new_users()
returnstriggeras $$
begininsertinto public.profiles (id, email)
values (new.id , new.email);
returnnew;
end;
$$language plpgsql security definer;
createtrigger on_auth_user_created
afterinserton auth.users
foreach rowexecuteprocedure public.handle_new_users();
This query will create a public table called profiles that we can use to get the users that are authenticated. You can view the created table profiles in the table editor section:

5. Now, we’ll create a TODOS table for our application using the table editor. To do that, fill in the options as shown below:
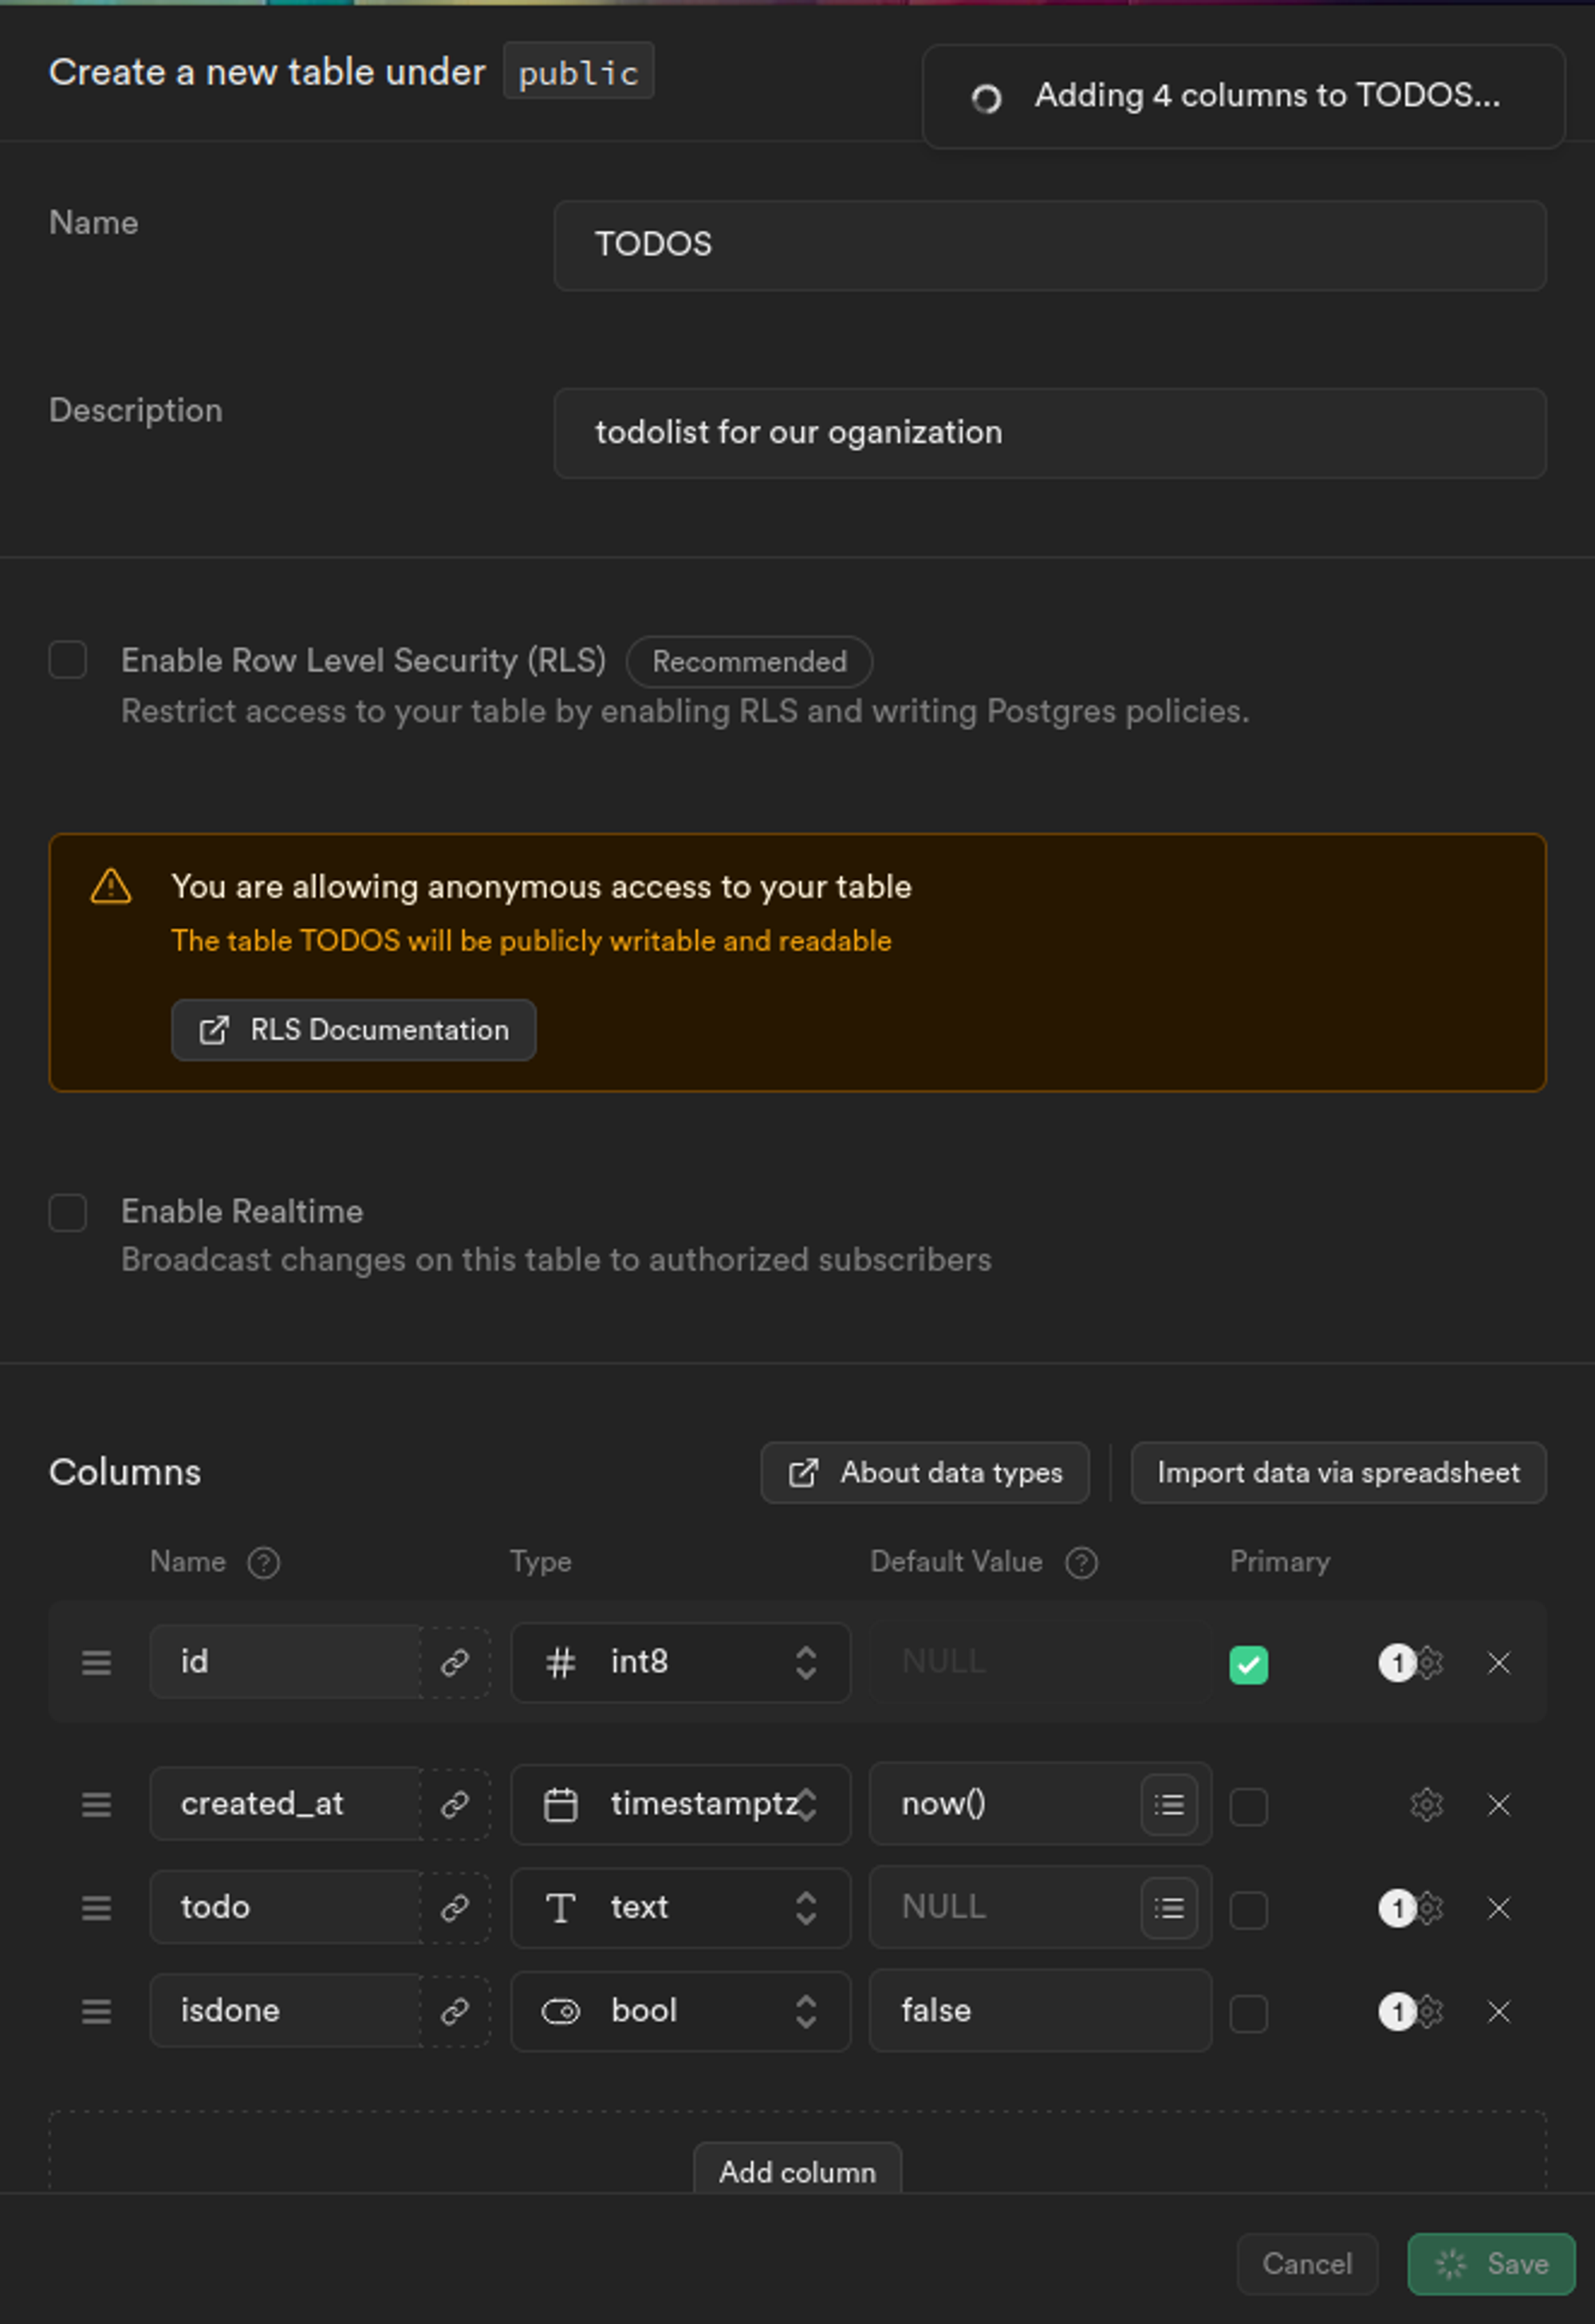
Notice how we have turned off the “Enable Row Level Security (RLS)” because we are going to manage authorization with permit.io so we won’t be needing it.
6. Next, we’ll get the key and URL. For that, go to the project dashboard, and we’ll find them in the Project API section.
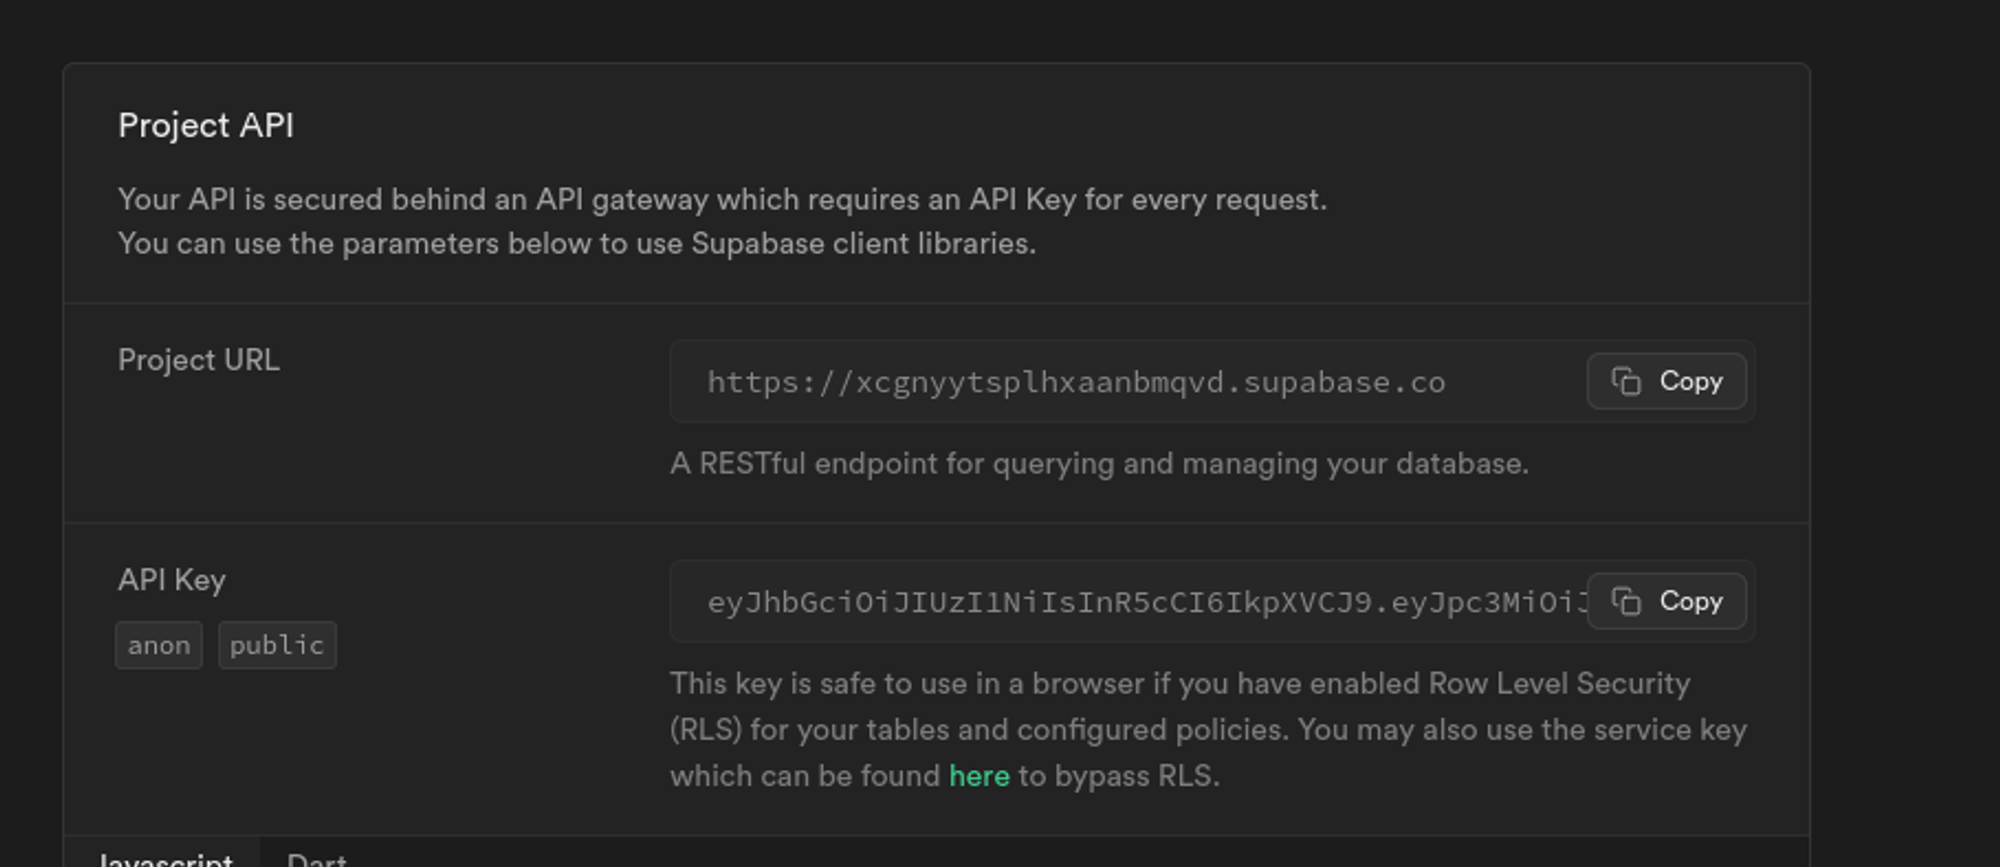
7. After getting the key and the URL, paste them into the .env file as :
VITE_SUPBASE_URL= "your url inside quotations"
VITE_SUPABASE_KEY="your key inside quotations"
8. Finally, save the changes and run the following command to start our React application:
npm run devVisit http://localhost:5173/ in your browser. You should be able to see this website:

That’s it! Our basic Supabase project setup is done.
Authenticate users with Supabase
Before we move ahead, let’s quickly look at the difference between authentication and authorization.
Authentication verifies the identity of a user attempting to access resources. It answers the question "Who are you?" by validating credentials like usernames, passwords or biometric data.
Authorization, on the other hand, determines what an authenticated entity is allowed to do or access within a system. It answers "What are you permitted to do?" based on predefined policies, roles, and access rules.
Supabase Auth uses a JWT-based approach using access and refresh tokens. Using JWTs and tokens streamlines the authentication process, improves scalability, enables cross-domain authentication, and enhances security compared to traditional session-based approaches.
Let’s add authentication to our application:
1. Go to the “Authentication” tab and look for the “Providers” section
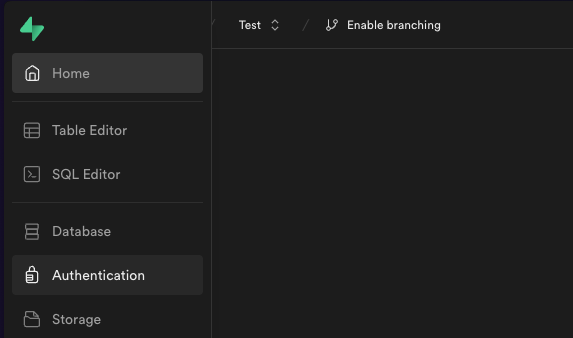
2. Find “Email provider” in the list. For this tutorial, we’ll turn off “Confirm email” and “Secure email change”
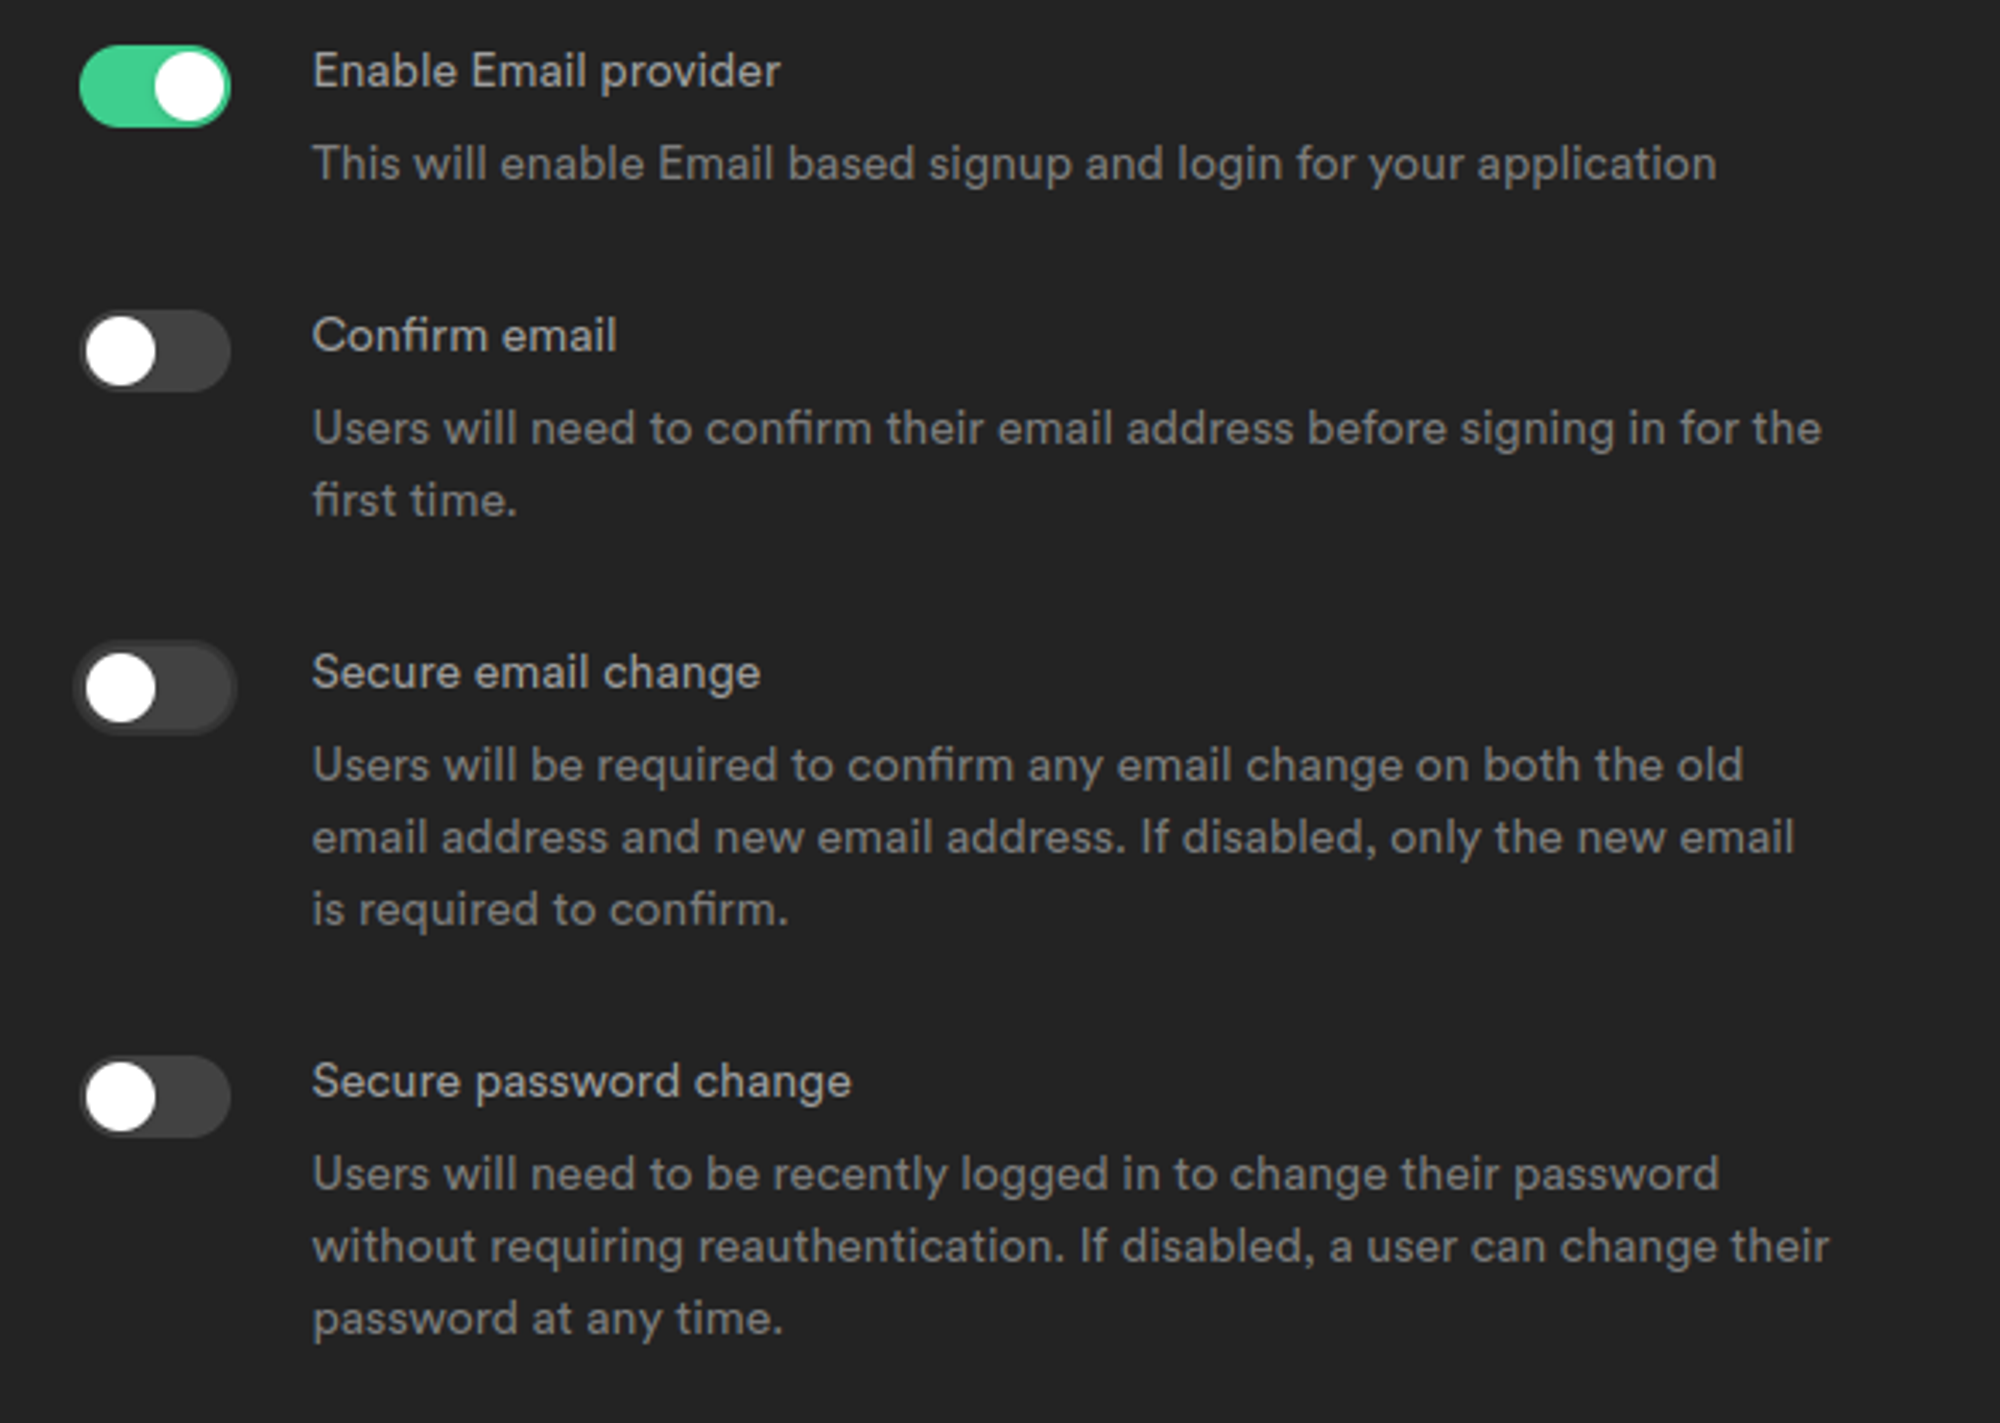
Once you have made the necessary modifications, click Save.
3. In auth.jsx file, inside the auth directory, paste the following signup function:
const signup =async (email, password) => {
const { data, error } =await supabase.auth.signUp({
		email: email,
		password: *password,
		options: {
			emailRedirectTo: '<http://localhost:5173/>',
	},
})

console.log(data);
console.log(data.session, data.user);

if(data.session){
	localStorage.setItem("session" , data.session.access_token);
	navigate('/');
	}
}
4. In the same file, remove the comment markers surrounding the signin function. Additionally, locate the useEffect hook positioned immediately below the signin function. Remove the comment markers from its code as well.
const signin =async (email, password) => {

  console.log(email, password)

const { data, error } =await supabase.auth.signInWithPassword({
    email: emailRef.current.value,
    password: passwordRef.current.value,
  })

if (data.session) {

    localStorage.setItem("session", data.session.access_token)
navigate('/');
  };

  console.log(data.session);
  console.log(error);

}

useEffect(() => {

if (localStorage.getItem("session"))navigate('/');

}, [])
5. Remove all the comment markers from the return statement
{activeTab === "signup" ?
  <section className='sign-box'>
    <input className='email-box' ref={emailRef} type="email" placeholder='email' required />
    <input className="password-box" ref={passwordRef} type="password" placeholder='password' required />
    <button className="submit-btn" type="submit" onClick={() => {
      if (emailRef.current.value && passwordRef.current.value) signup(emailRef.current.value, passwordRef.current.value)
    }}>
      Sign up
    </button>
    <span className="sign-anchor" onClick={() => {
      setActiveTab("signin")
    }}>already have an account ? signin</span>
    {error ? <span style={{ padding: "20px 20px 10px 20px", fontSize: "13px", color: "red" }}>{String(error)} ! please try again</span> : null}
  </section>
<button className="submit-btn" type="submit" onClick={() => {
if (emailRef.current.value && passwordRef.current.value) signin(emailRef.current.value, passwordRef.current.value)
}}>That’s it! You've now successfully added authentication to your application!
The diagram below represents how the signup and signin functionality is working.
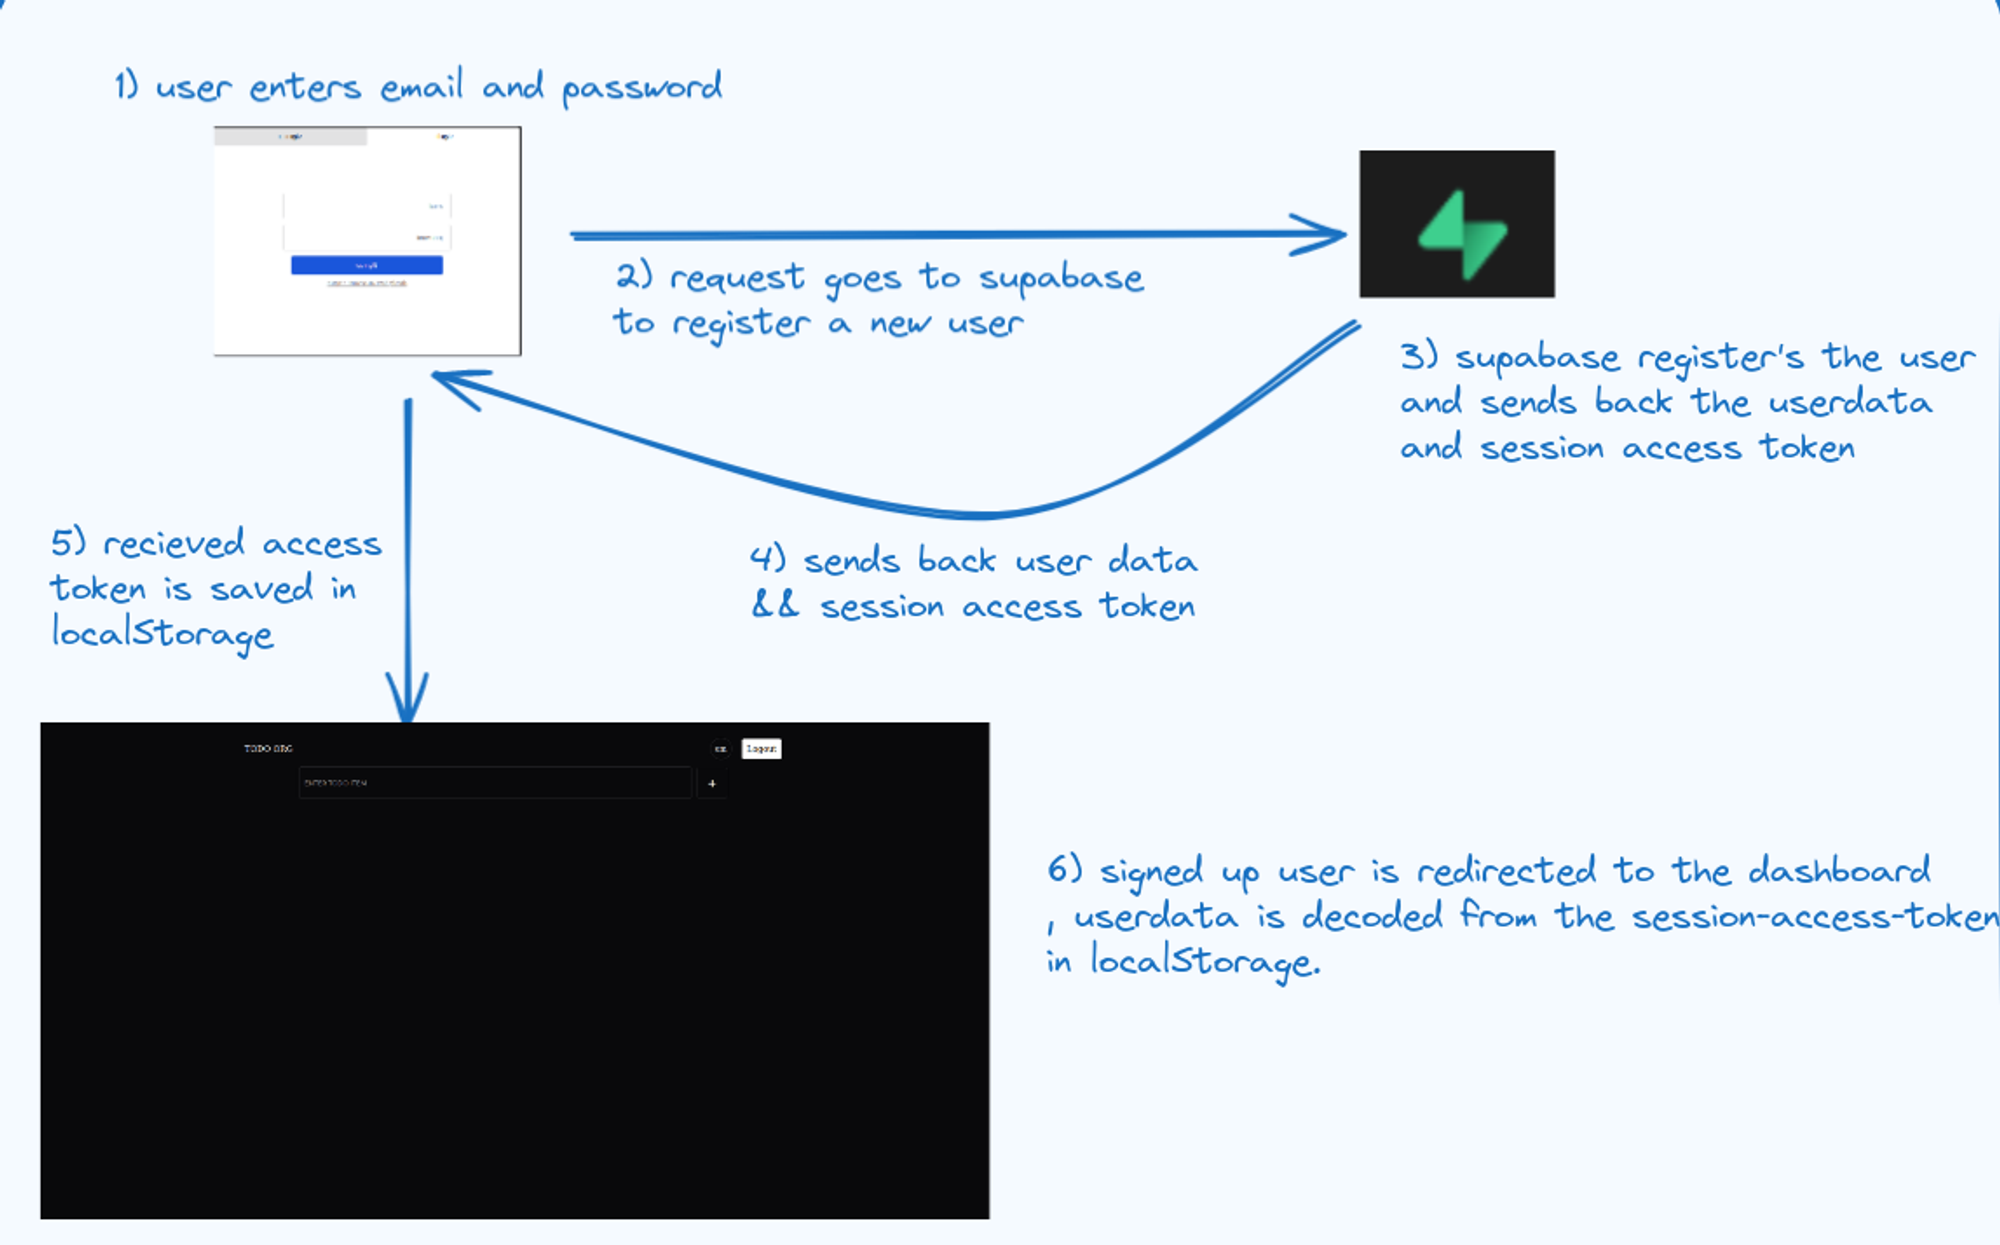
Let’s try out the authentication and add some users to your application.
For now, we’ll be adding 2 users using the signup functionality we just added, admin@gmail.com and employee@gmail.com
This is what the profiles table in the table editor section should look like in the end :

With that, we have successfully added authentication to our todo-application.
How not to do Authorization in Supabase
With authentication set up, let’s move on to authorization. Traditionally, authorization is often implemented using imperative if statements. Let’s see why that’s not a good idea:
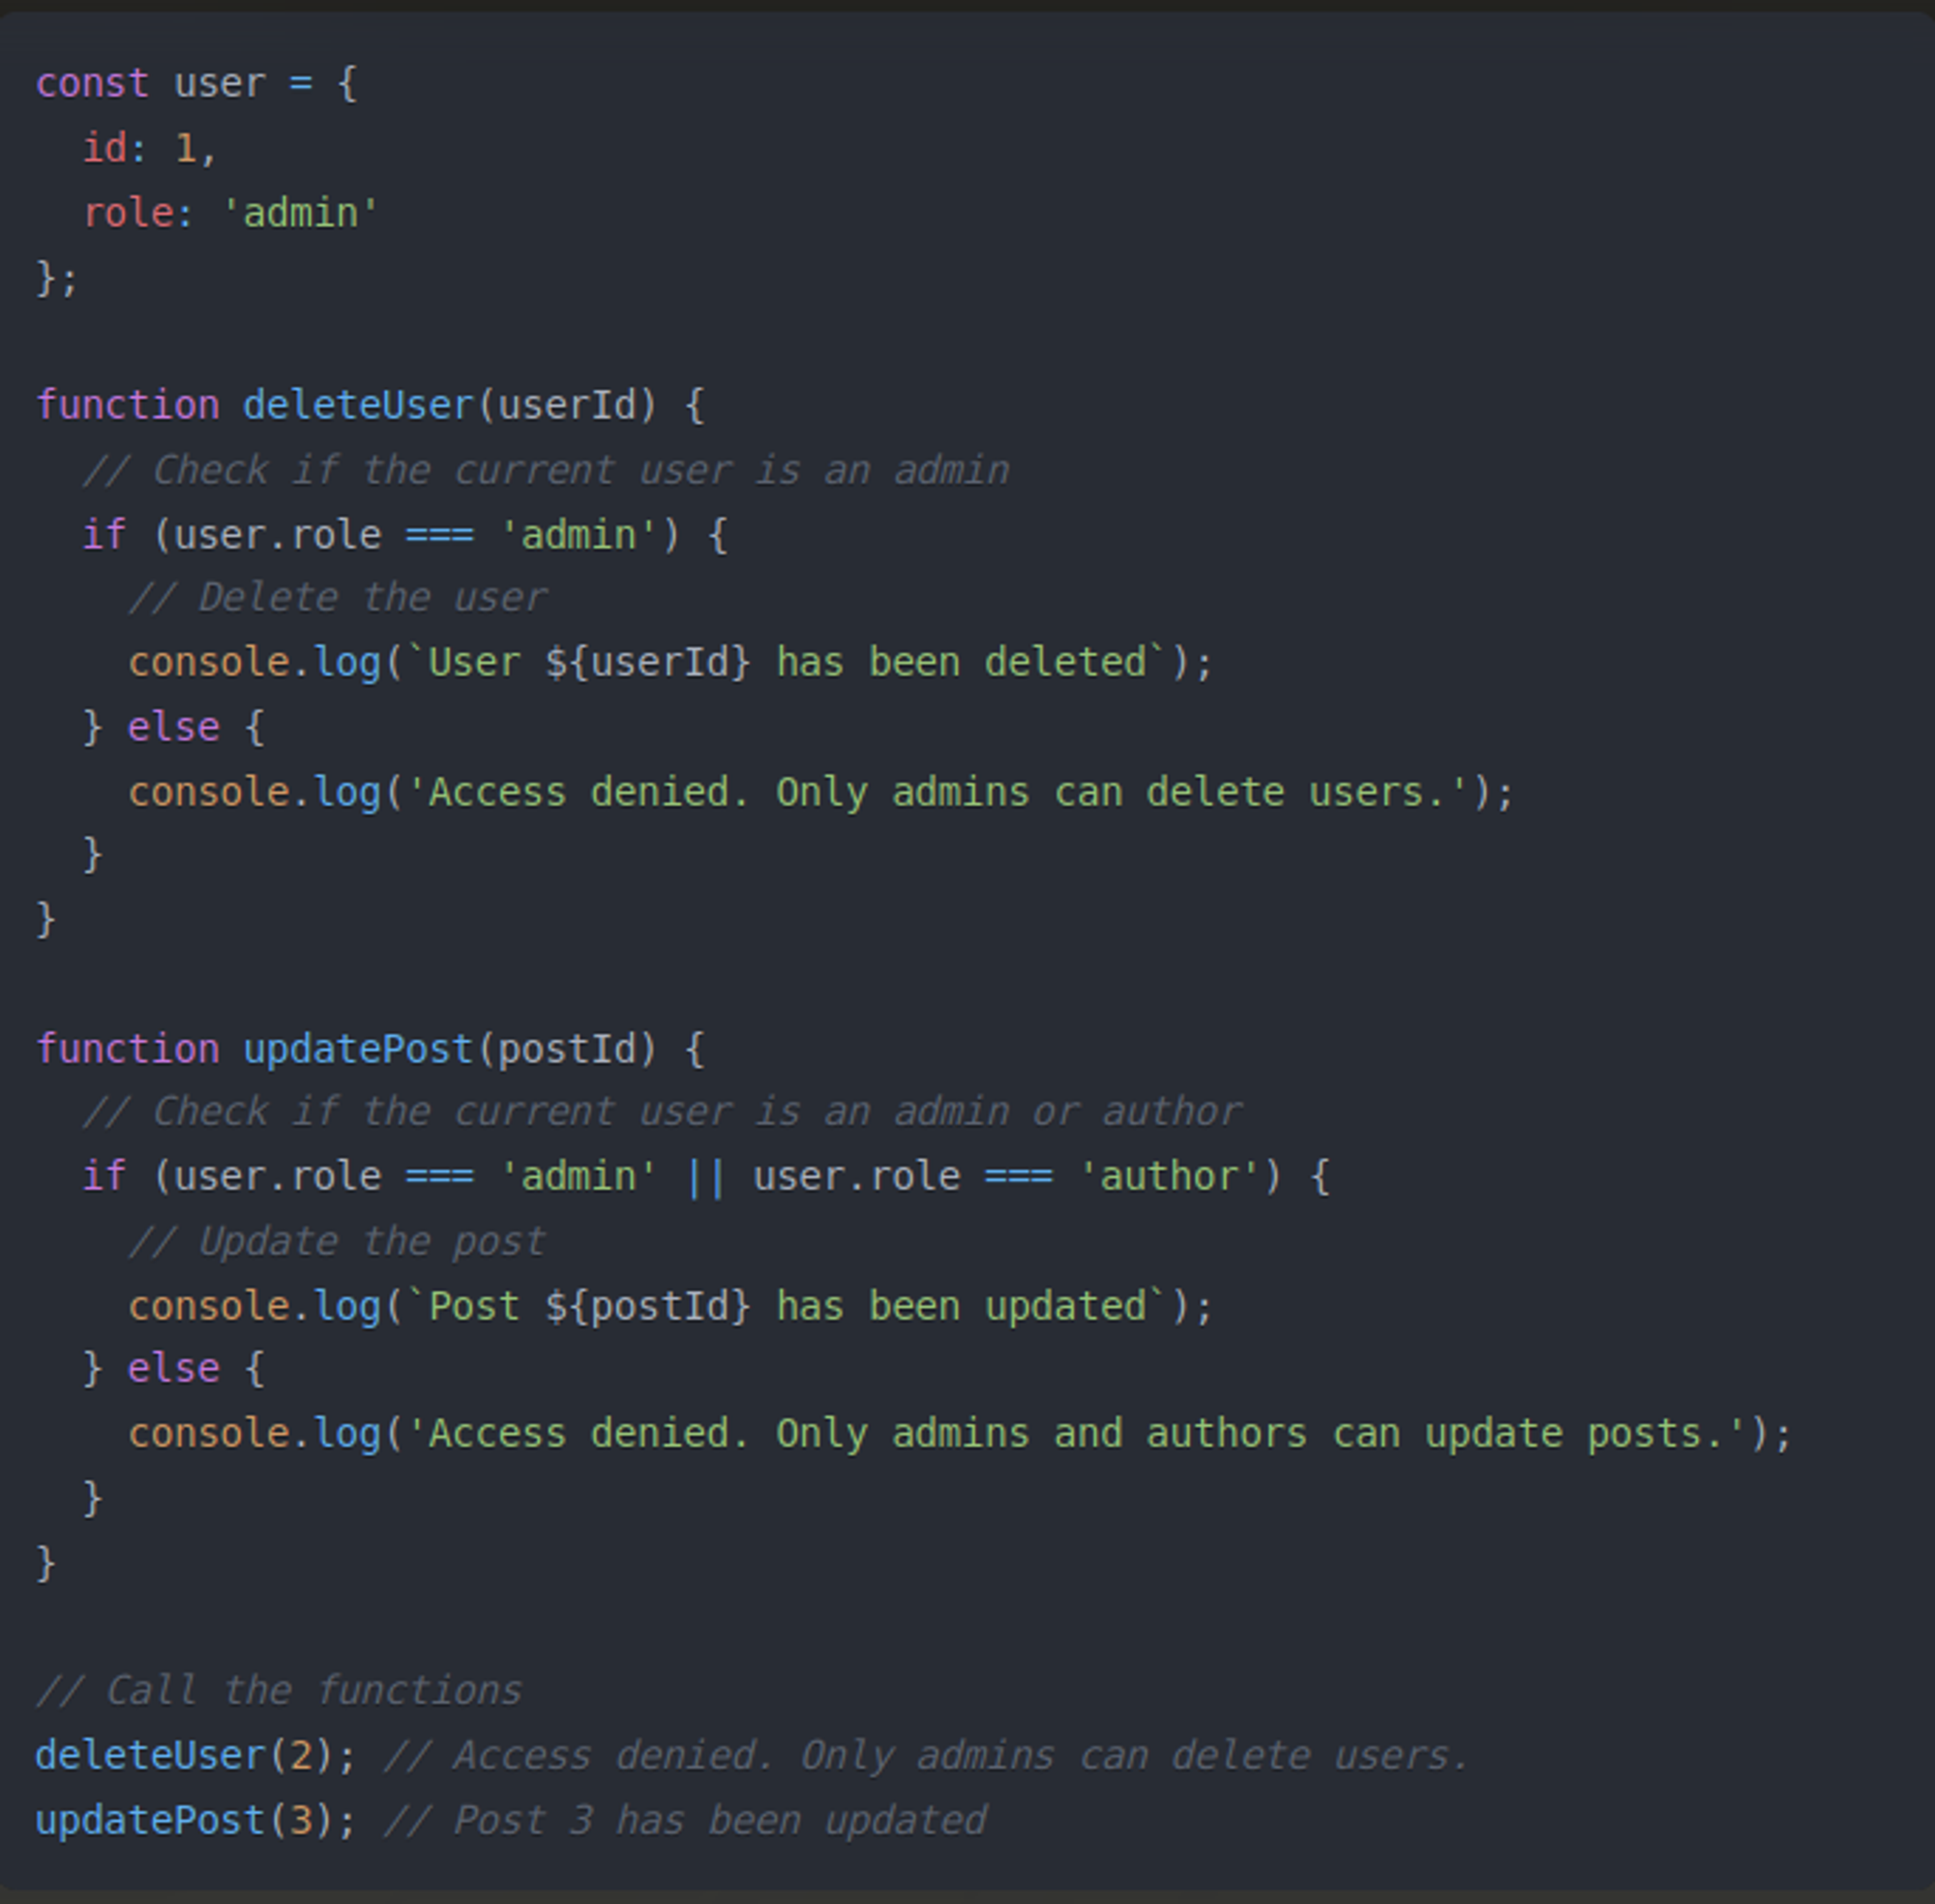
In this example, we have a user object with an id and a role property. The deleteUser function checks if the current user's role is admin before allowing the user to be deleted. The updatePost function checks if the current user's role is either admin or author before allowing the post to be updated.
This approach of hard-coding authorization rules using imperative if statements have several drawbacks:
Lack of Centralization - When authorization logic is spread across various parts of an app, it makes it challenging to manage and maintain the rules as the application scales. This potentially creates inconsistencies in the app’s authorization, which can be a major security issue.
Duplication - Implementing authorization directly within function calls often leads to repetitive checks across multiple functions. Similar
ifconditions may be duplicated in various methods of handling different aspects of user management or content control. This repetition not only bloats the codebase but also increases the risk of errors during updates or modifications.Complexity - As the number of roles and permissions increases, the imperative approach can lead to highly complex and nested
ifstatements. This complexity makes the code harder to read and understand and introduces bugs, as maintaining accurate logic across extensive conditional structures becomes more challenging.Inflexibility - Hard-coded conditional statements for authorization are inflexible and do not adapt well to changes, such as adding new roles or changing permission levels. Every change requires manual updates to the corresponding
ifstatements throughout the application, which is time-consuming and prone to errors.
While this approach works for simple applications, it quickly becomes problematic as the application grows in complexity. This is why, it is recommended to use more structured and flexible authorization mechanisms, such as role-based access control (RBAC) or attribute-based access control (ABAC).
For this tutorial, we are going to implement Permit.io’s RBAC authorization model. Supabase's row-level security rules (row rules) are a good feature for controlling data access, but they aren’t built to scale well in larger, more complex applications. While row rules are convenient for simple authorization needs or smaller applications, larger and more complex applications require more fine-grained approaches like RBAC, ABAC, or caching mechanisms to achieve better scalability, flexibility, and performance.
Configuring Basic Supabase RBAC in Permit
Now that we've have added authentication and understood why the RBAC model is a great start for authorization, let’s implement a simple RBAC model in our application using Permit.io
To get started with configuring permissions, log in to app.permit.io . After logging in we’ll create a new workspace for this project.
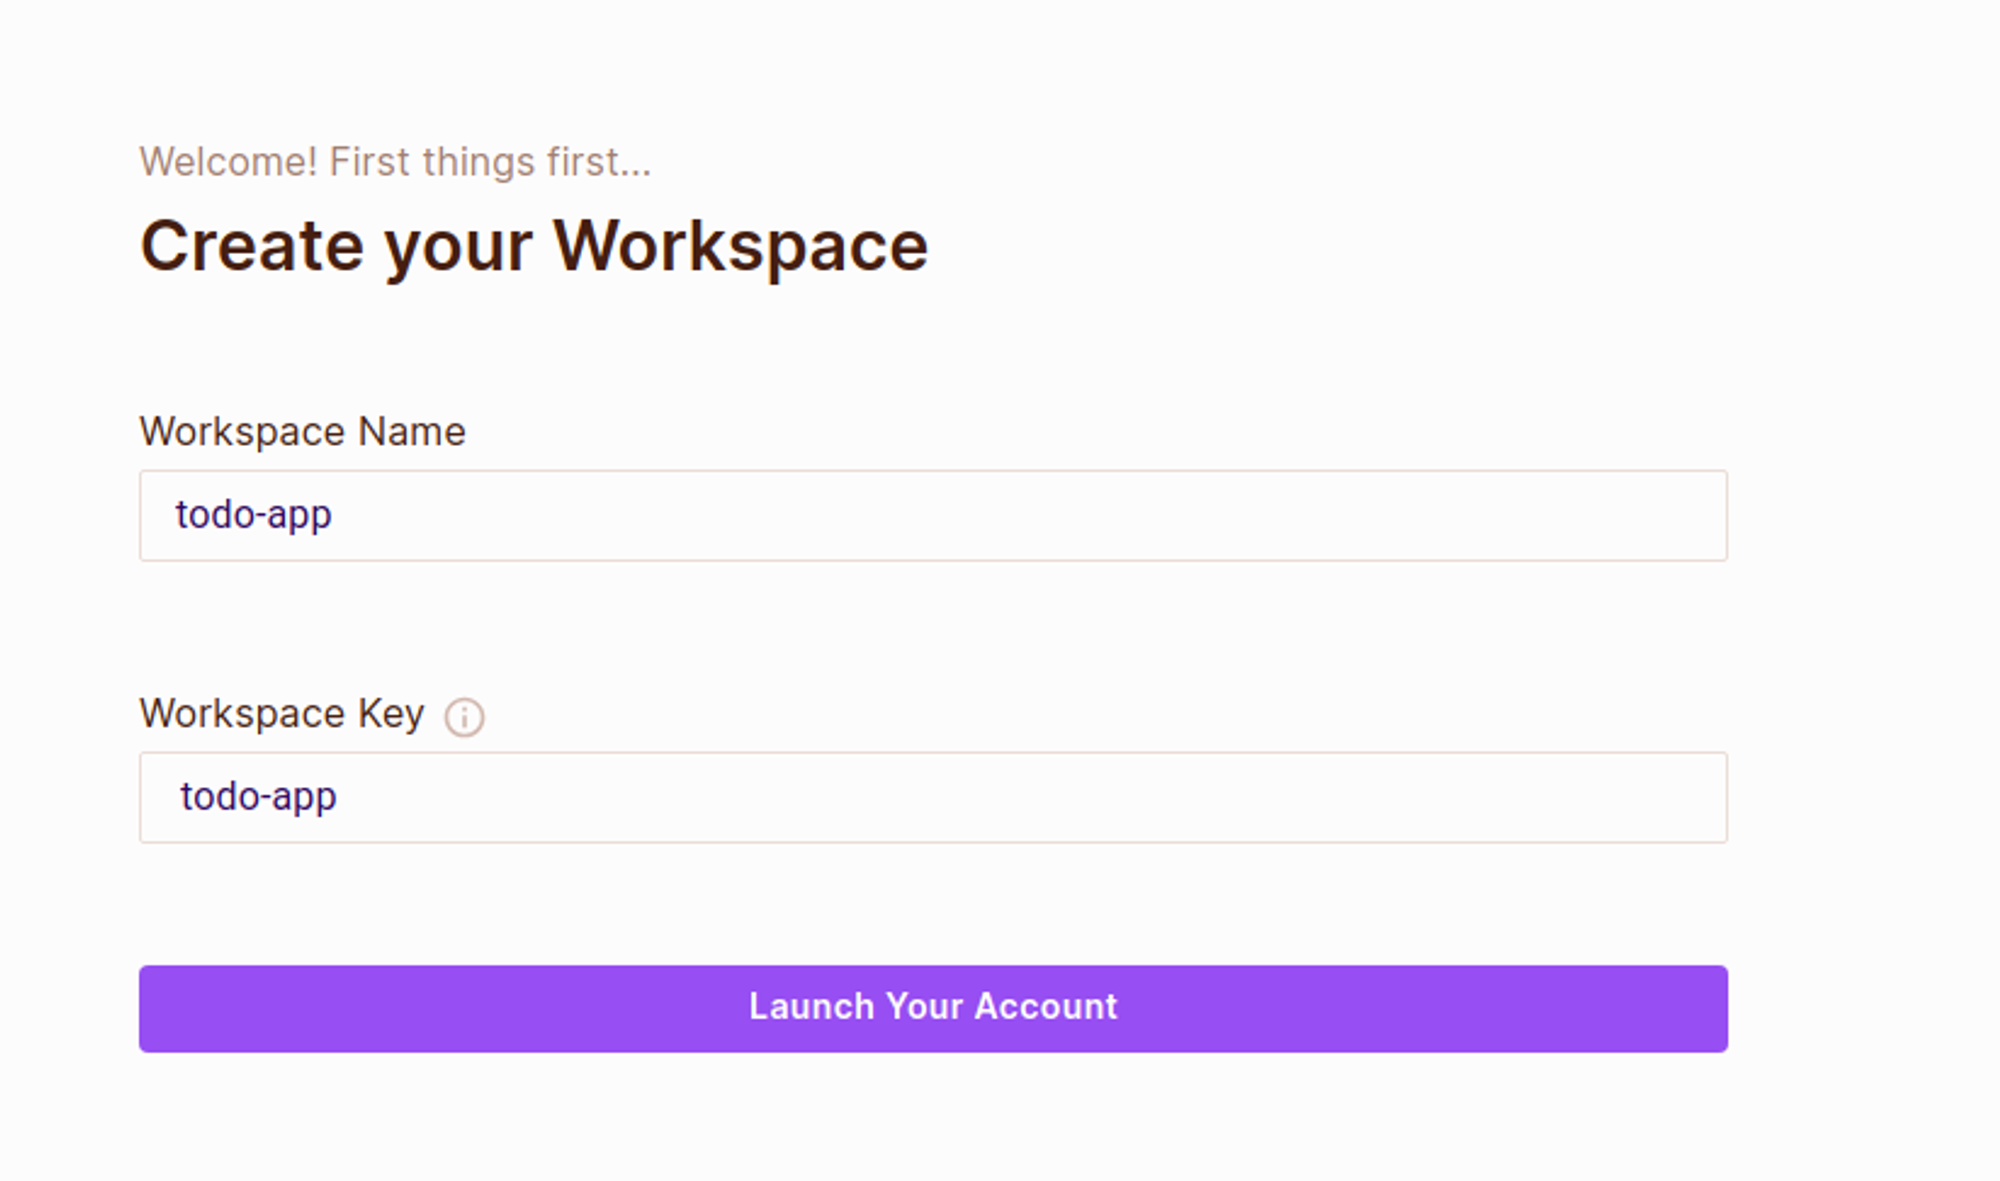
To start with, we’ll create a role. Roles are an easy way to group permissions and assign them to users or other entities.
- Go to the Policy page and click Create > Role
- Add the following roles, with actions as depicted below:
- Admin
- Employee
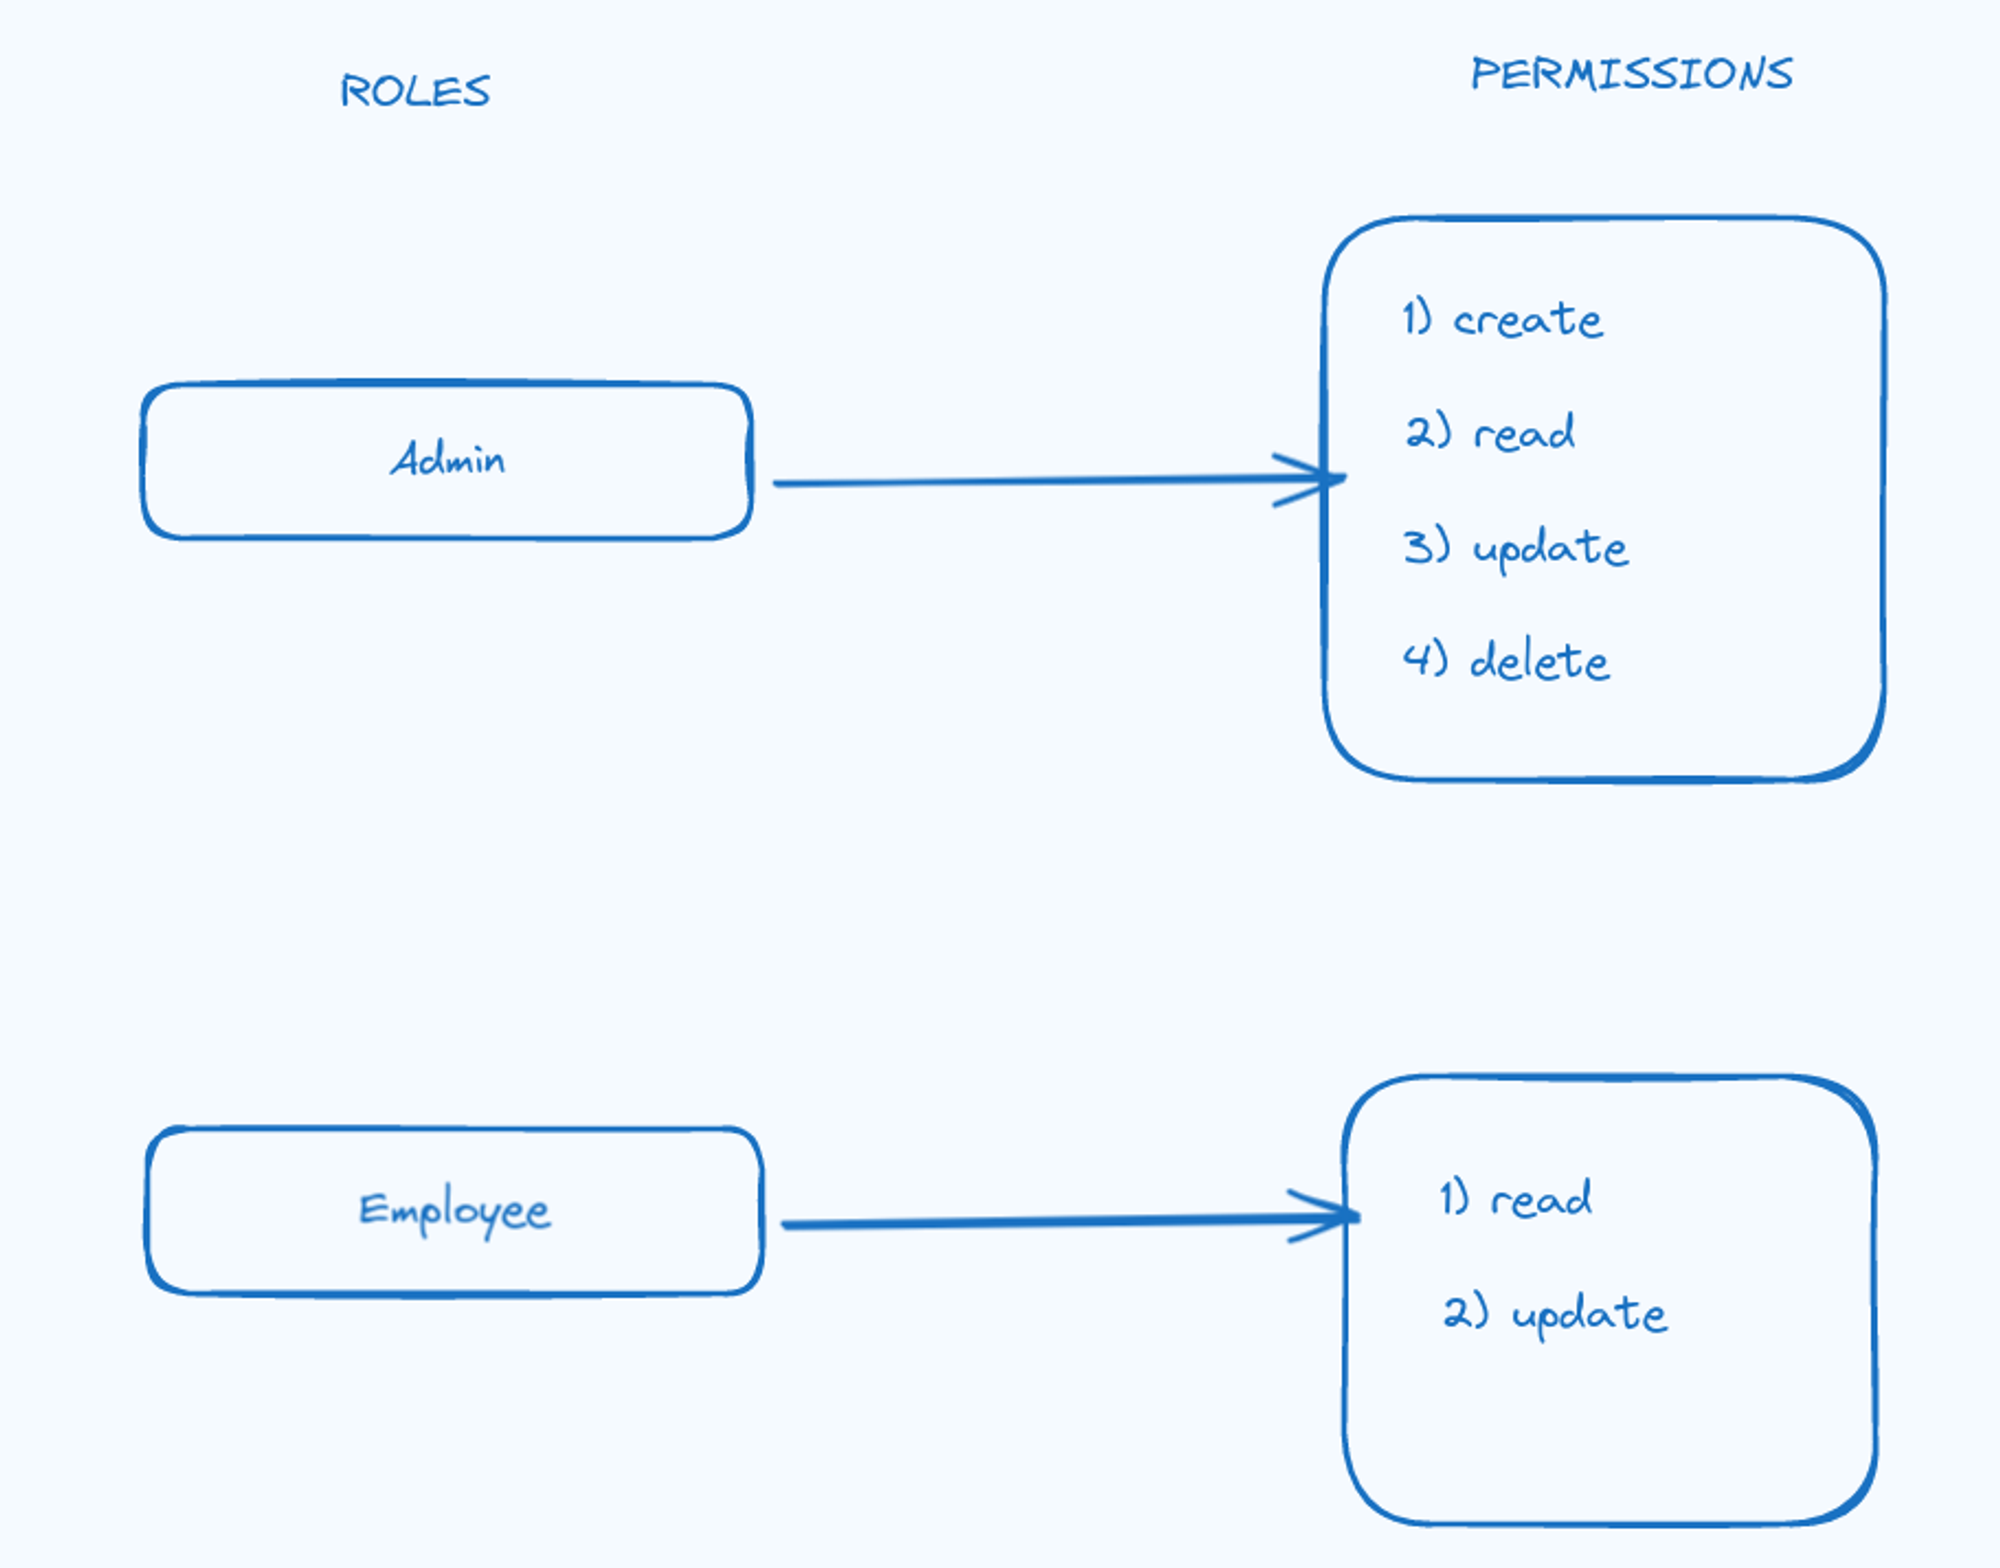
With our roles created, let’s create a resource.
- Go to the Policy page and click Create > Resource
- Create the following resource and assign it with Actions:
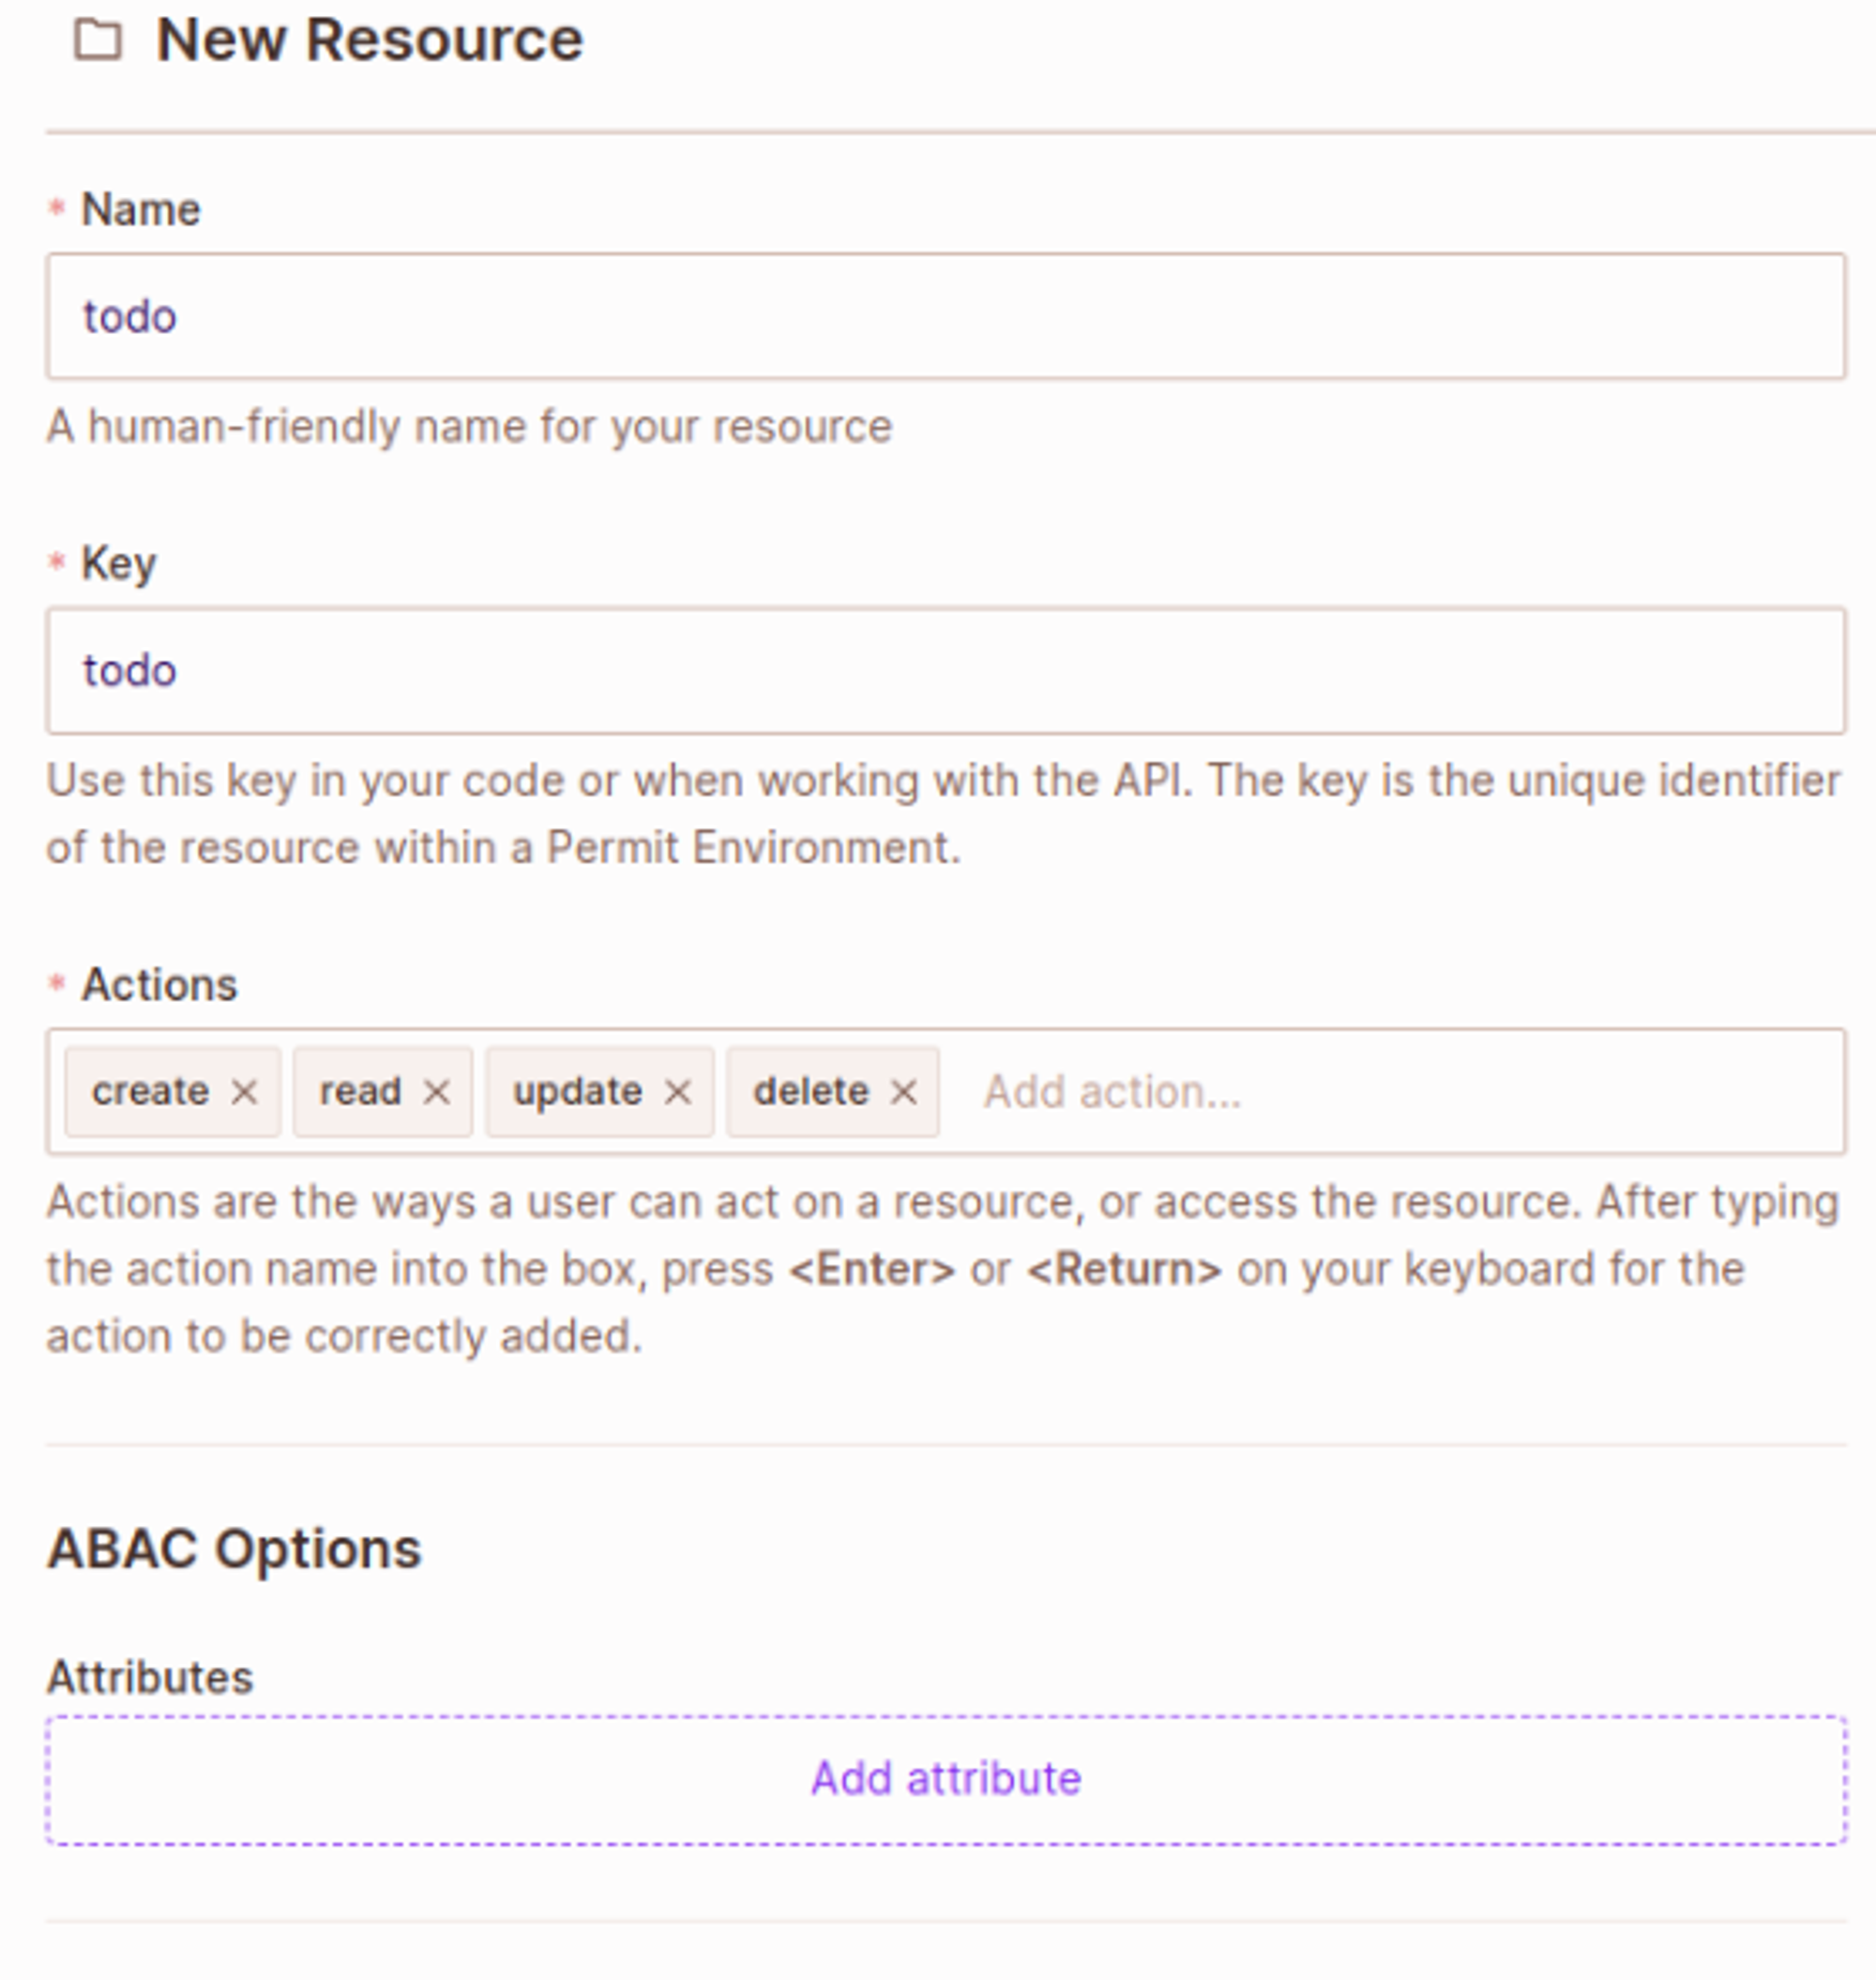
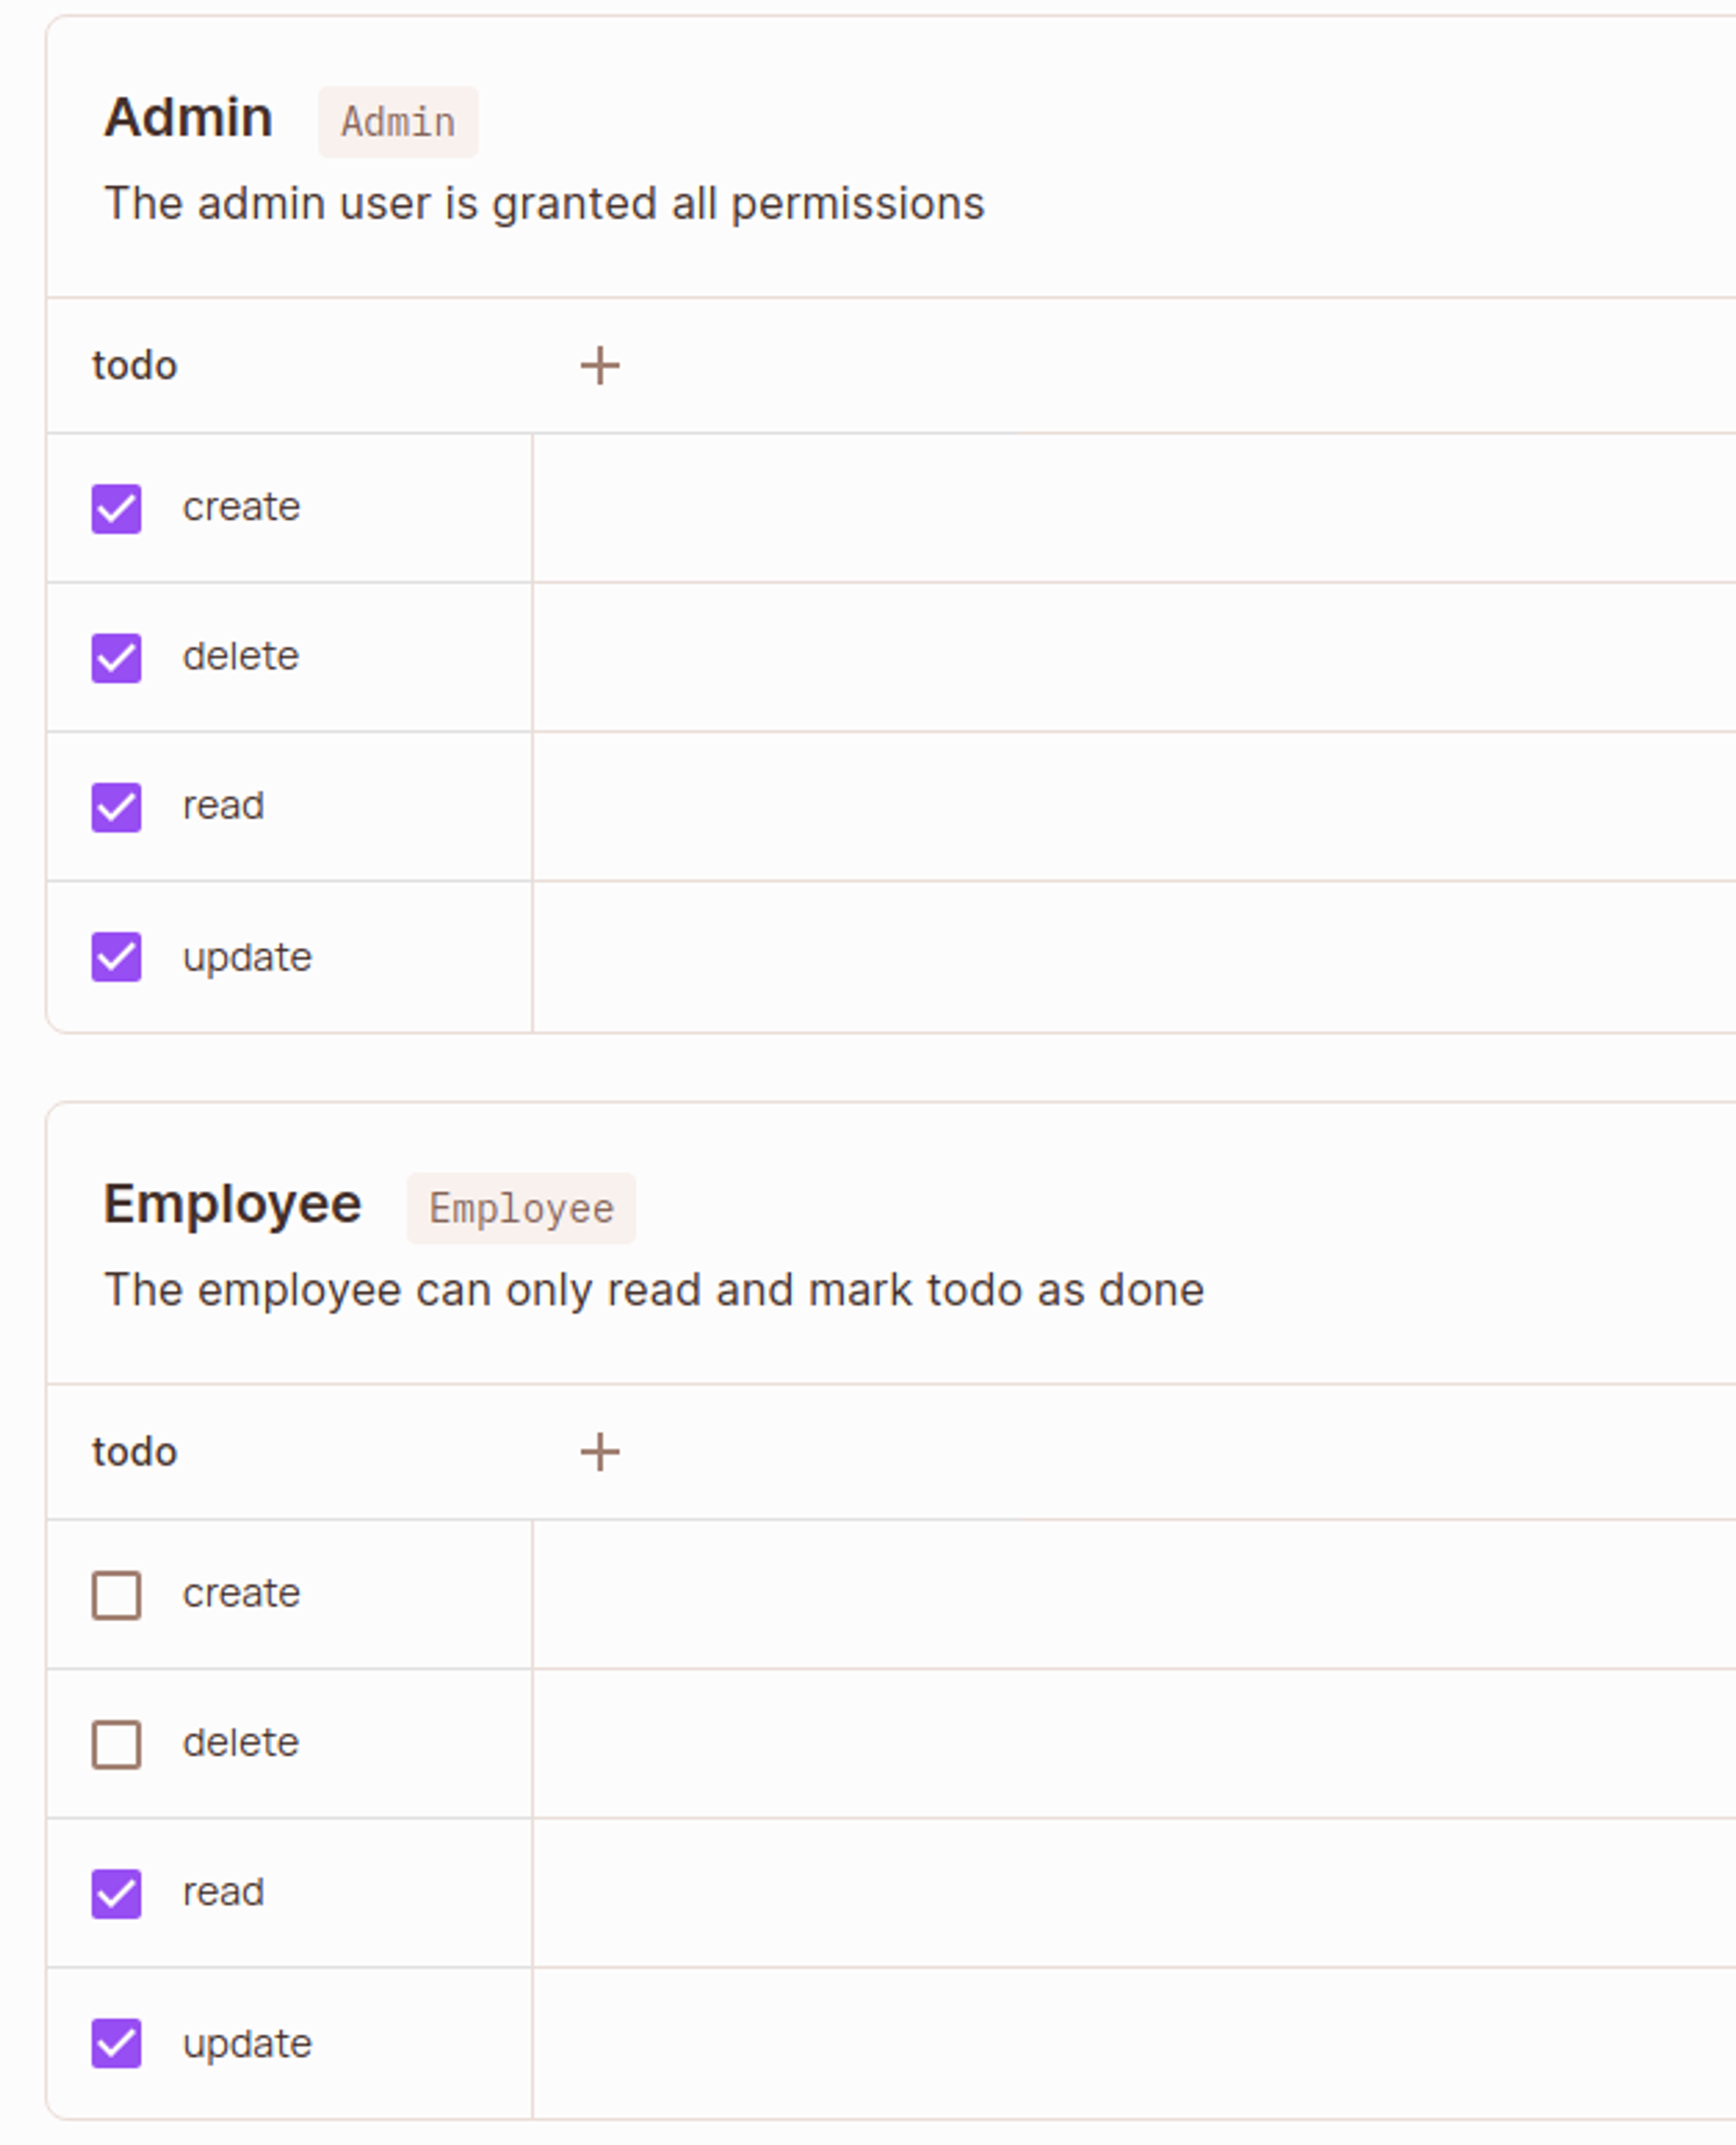
With the roles, resources, and actions we just created, we have an outline of the policy table configuration. Now let’s create our policy, go to the policy editor, check all the checkboxes like shown below, and save changes:
Next, we’ll go to the directory section and create a new tenant:
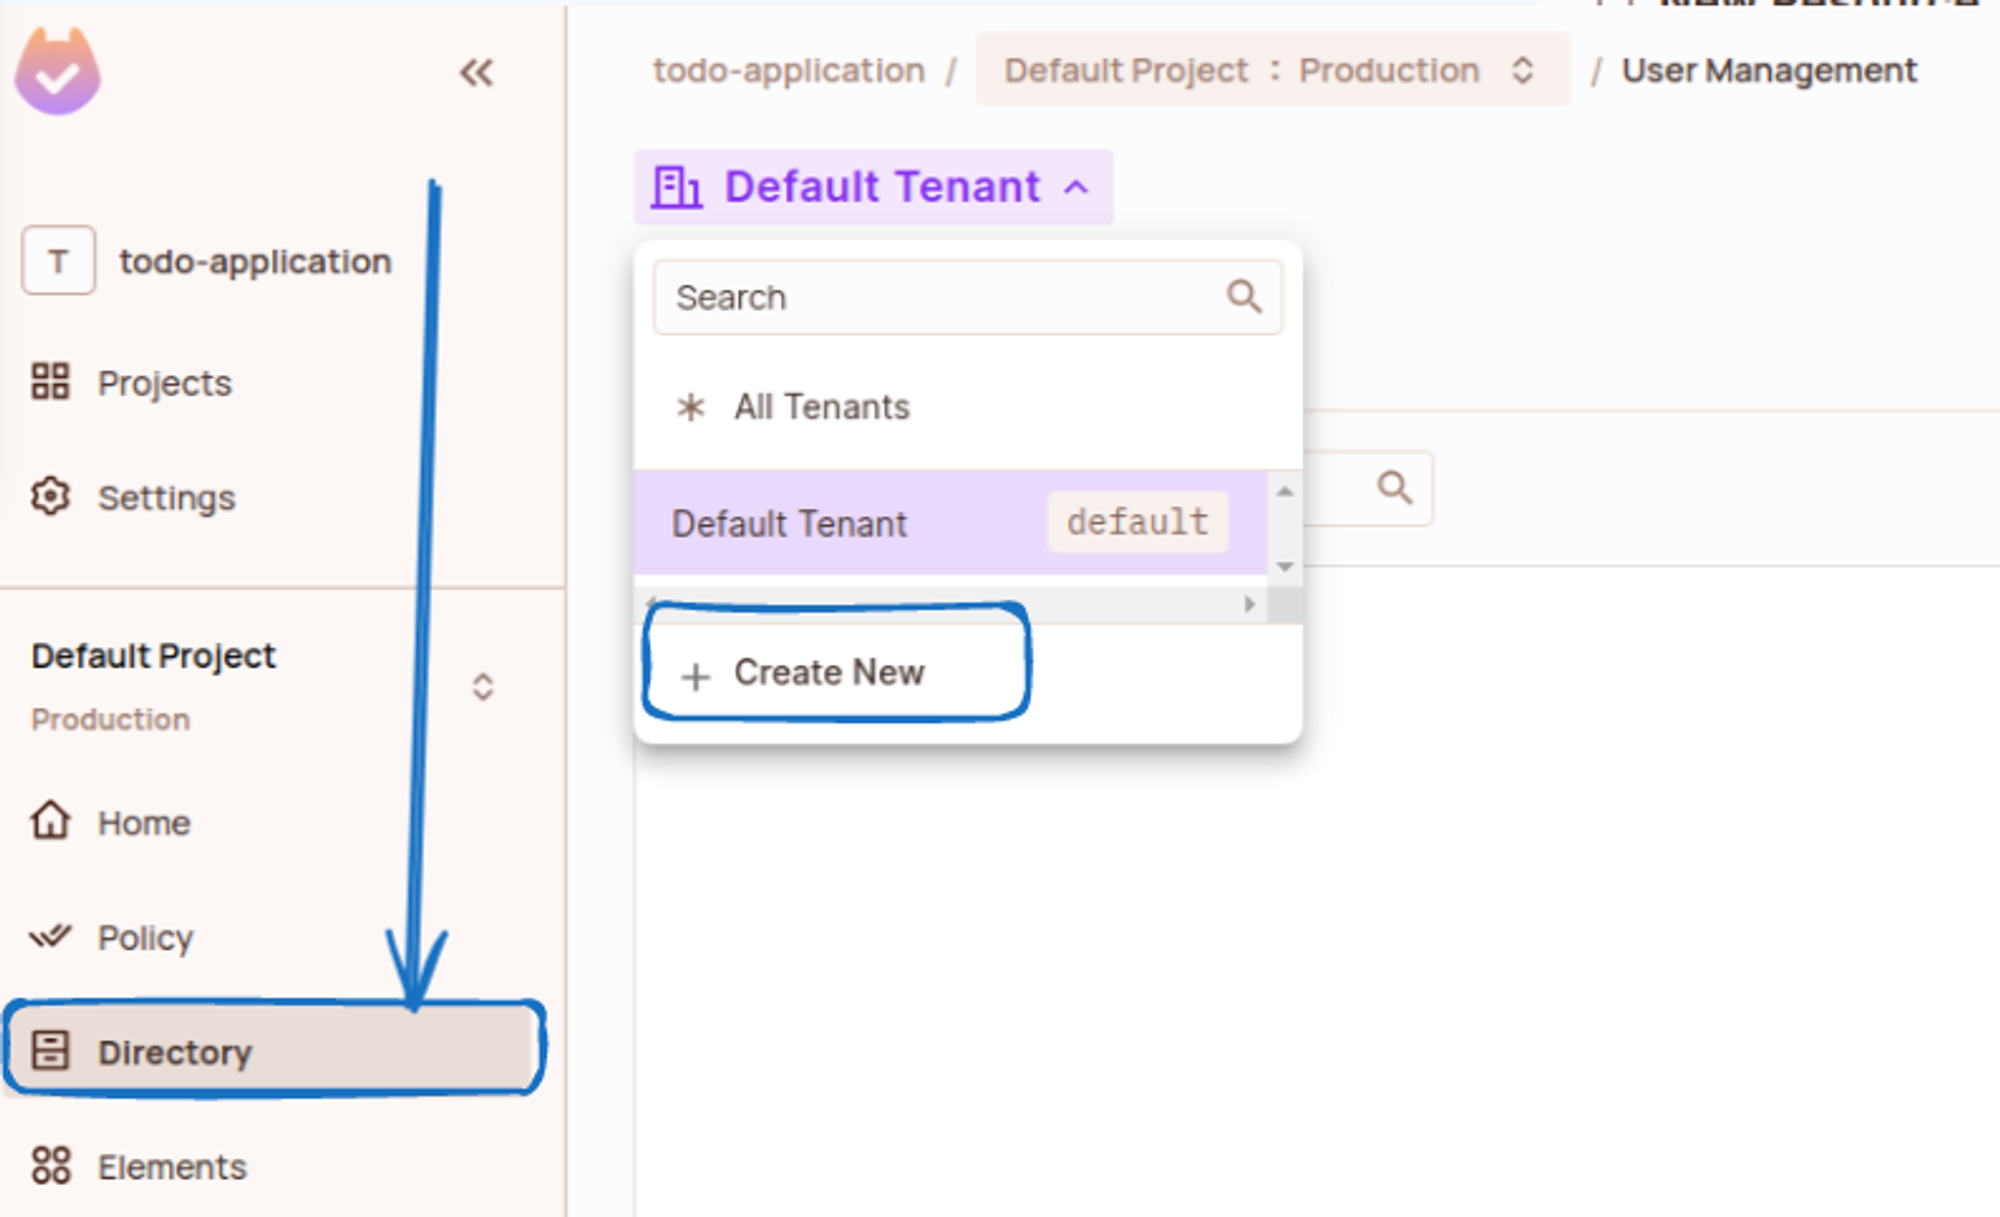
To create a new tenant, we need to fill in the name and description of the tenant as shown below :
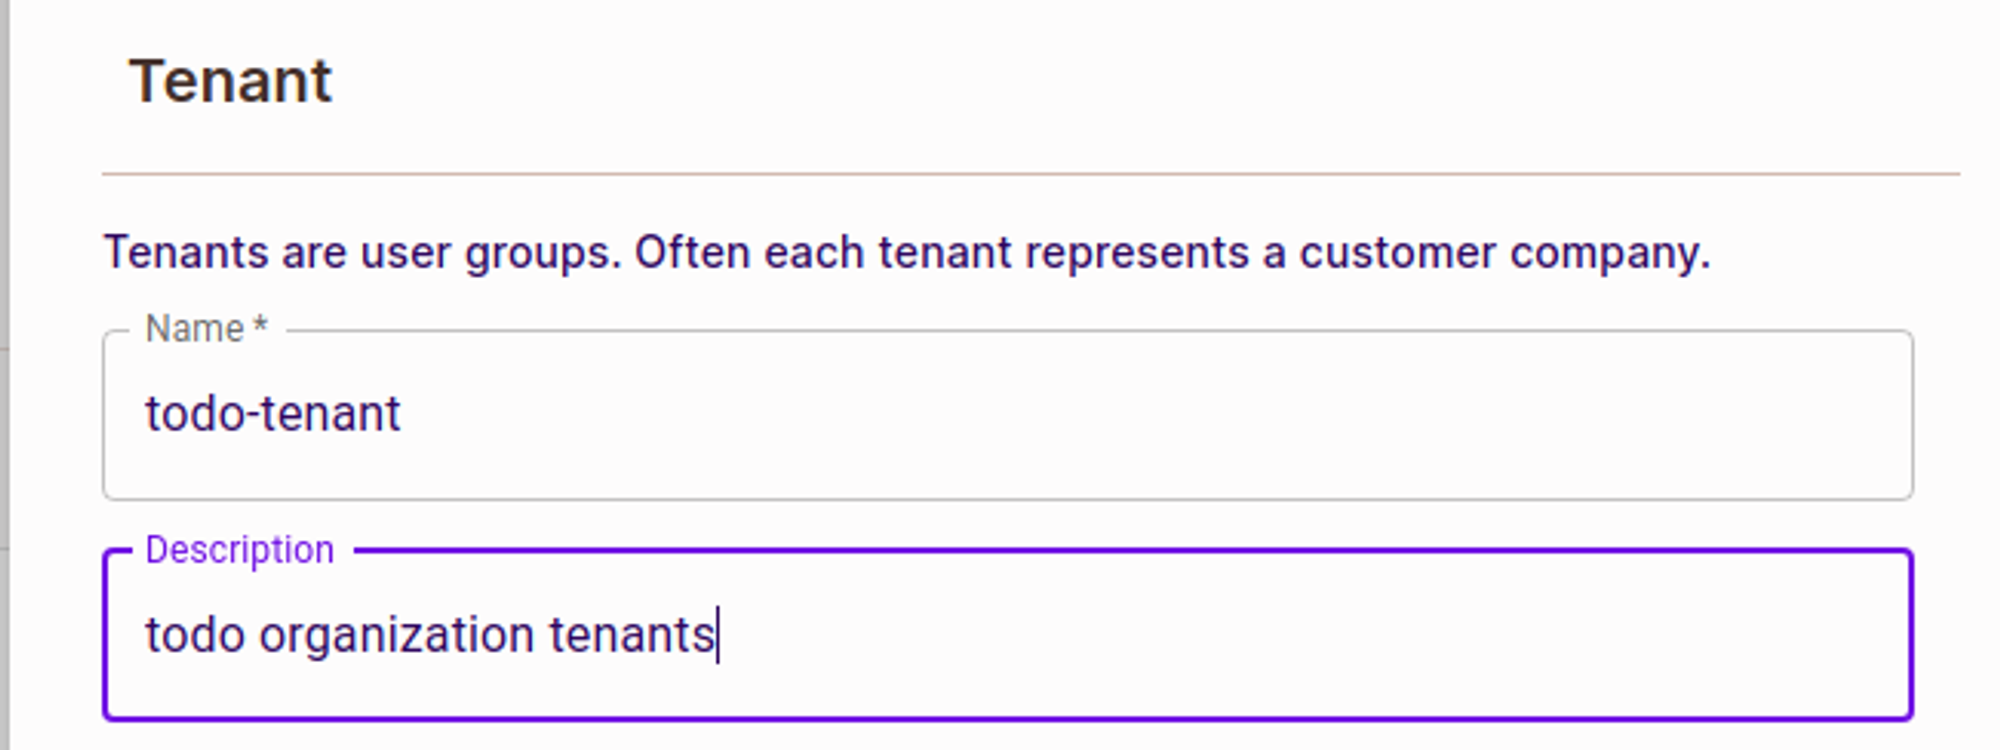
That's all it took for us to create a Role-Based Access Control (RBAC) model that we can use in our applications. Permit’s clean and easy-to-use user interface made integrating authorization into our code look that simple.
Creating API endpoints with edge functions in Supabase :
Before moving ahead, we need to create some API endpoints. These will act as authorization middleware for our application, using Supabase edge functions:
To create Supabase Edge functions, we first need to initialize a Supabase project.
Navigate to your React project's root path in the terminal and execute the following command to initialize a Supabase project:
npx supabase initOnce the project is created, execute the following command in your terminal to create an endpoint. This endpoint will sync users after signup to our permit directory:
npx supabase functions new createUserNext, let's create another edge function. This function will check if the user has access to operations. To do this, execute:
npx supabase functions new check-permissionWe'll also need to create a .env file in the "/supabase/functions" directory.
Get the environment key from the account section in your dashboard and add it in .env as
**PERMIT_TOKEN=’YOUR API KEY inside quotations’**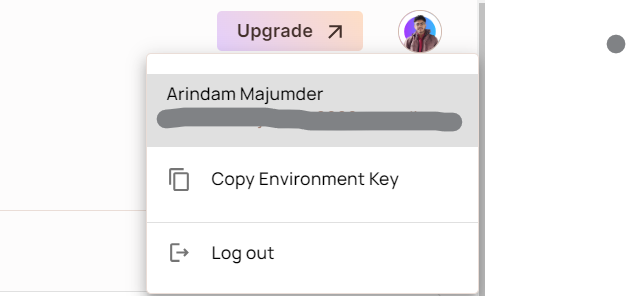
This is how your directory structure should look like :

Now, let’s add logic in our edge functions :
/check-permission/:id/:operation- This function checks the user's permissions.
- Clear the index.ts file in the check-permission directory and paste the following code:
import { Permit } from "npm:permitio"; const corsHeaders = { 'Access-Control-Allow-Origin': "*", 'Access-Control-Allow-Headers': 'Authorization, x-client-info, apikey, Content-Type', 'Access-Control-Allow-Methods': 'POST, GET, OPTIONS, PUT, DELETE', } Deno.serve(async (req) => { const permit = new Permit({ // your API Key token: Deno.env.get("PERMIT_TOKEN"), pdp: "<https://cloudpdp.api.permit.io>", }); if (req.method === 'OPTIONS') { return new Response('ok', { headers: corsHeaders }) } const url = new URL(req.url); const id = url.pathname.split('/')[2]; const operation = url.pathname.split('/')[3]; let response; try{ const permitted = await permit.check( String(id) , String(operation) , { type: "todo", tenant: "todo-tenant", }); if (permitted) { response = { "status" : "permitted" } } else { response = { "status" : "not-permitted" } } return new Response(JSON.stringify(response), { headers: corsHeaders , status : 200 }) }catch(err){ response = { "problem": "internal server error", "error" : err } return new Response(JSON.stringify(response), { headers: corsHeaders , status : 500 }) } })/createUser- This is for creating a user with an employee role in our permit directory.
- Clear the index.ts file in the createUser directory and paste the following code:
import { Permit } from "npm:permitio";

const corsHeaders = {
  'Access-Control-Allow-Origin': "*",
  'Access-Control-Allow-Headers': 'Authorization, x-client-info, apikey, Content-Type',
  'Access-Control-Allow-Methods': 'POST, GET, OPTIONS, PUT, DELETE',
}

Deno.serve(async (req) => {

    const permit = new Permit({
      // your API Key
      token: Deno.env.get("PERMIT_TOKEN"),
      pdp: "<https://cloudpdp.api.permit.io>",

    });

  if (req.method === 'OPTIONS') {
    return new Response('ok', { headers: corsHeaders })
  }

  const { data } = await req.json()

  const users = {
      key: data.user.id ,
      email: data.user.email ,
  }

  const assignedRole = {
      role : "Employee",
      tenant : "todo-tenant",
      user : data.user.id
  }

  let response ;

  try{
      await permit.api.createUser(users);
      const response1 = await permit.api.assignRole(JSON.stringify(assignedRole));
      const response2 = await permit.api.tenants.listTenantUsers({
          tenantKey: "todo-tenant",
          page: 1,
          perPage: 100,
      });

      response = {
        msg : "employee with tenant role created successfully"
      }

      return new Response(JSON.stringify(response), { headers: corsHeaders  , status : 200})

  }catch(err){
      console.log(err);
      response = {
        error : err
      }

      return new Response(JSON.stringify(response), { headers: corsHeaders , status : 500})
  }

})
Now that we've implemented the logic, let's deploy our edge functions.
To do this, execute the following command in the terminal:
npx supabase start # start the supabase stack
npx supabase functions serve # start the Functions watcher
That's it! Our Supabase Edge functions are now running at http://localhost:54321/functions/v1/<function_name>
But before we proceed, let's execute the following command and copy the anon key:

Add it in the .env file of our react project as :
**VITE_AUTH_HEADER_SUPBASE=”your anon key inside quotations”
VITE_AUTH_HEADER_SUPBASE=”your anon key inside quotations”**
Add the Check Function, Check Permissions, and Change Them Dynamically
Now that our edge functions are set up, let’s follow the steps below to add create, read, update, and delete functionality in our todo application and add authorization to it:
1. Clear signup function and Uncomment the commented signup function in auth.jsx:
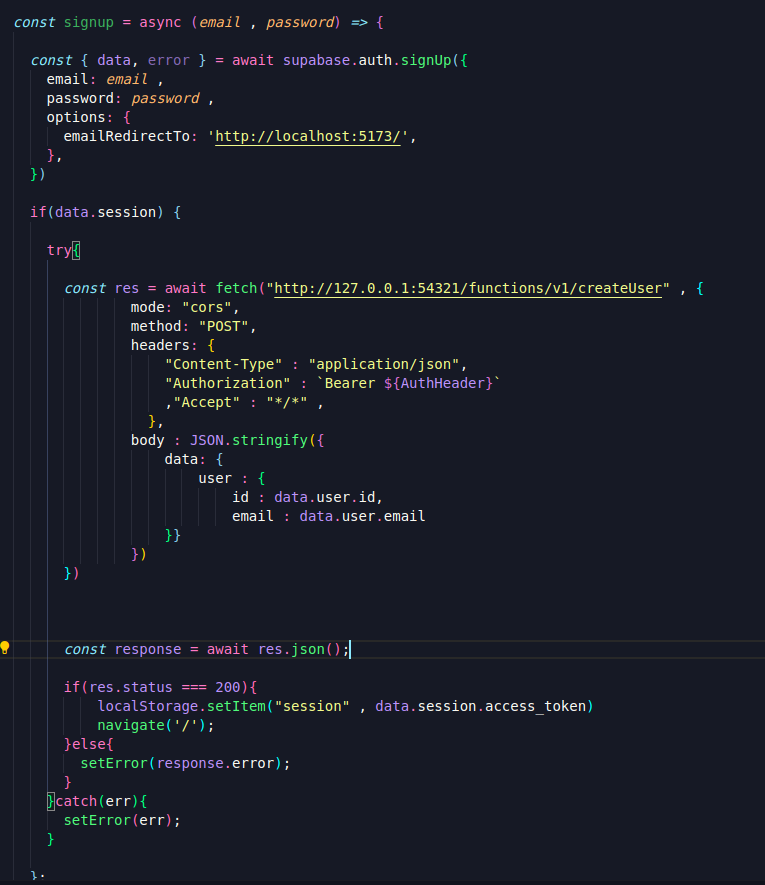
The main modification we made here is that before setting the session data in localStorage, we make an API call to our backend. This call registers our users in the directory and assigns them the Employee role.
2. Go to todo.jsx in todo directory and uncomment all the commented code.
// An example of the editTodo endpoint using the check-permission

async function editTodo(todo_id){

      const res = await fetch(`http://localhost:54321/functions/v1/check-permission/${id}/update`, {
        headers: {
          "Authorization" : `Bearer ${AuthHeader}`
        }
    })
        const response = await res.json();
        if(response.status === "permitted"){

          todoRef.current.value = "";
          setUpdatingTodo({id : todo_id});

        }
  }
Now, try to sign up with employe1@gmail.com and admin1@gmail.com using our user interface:
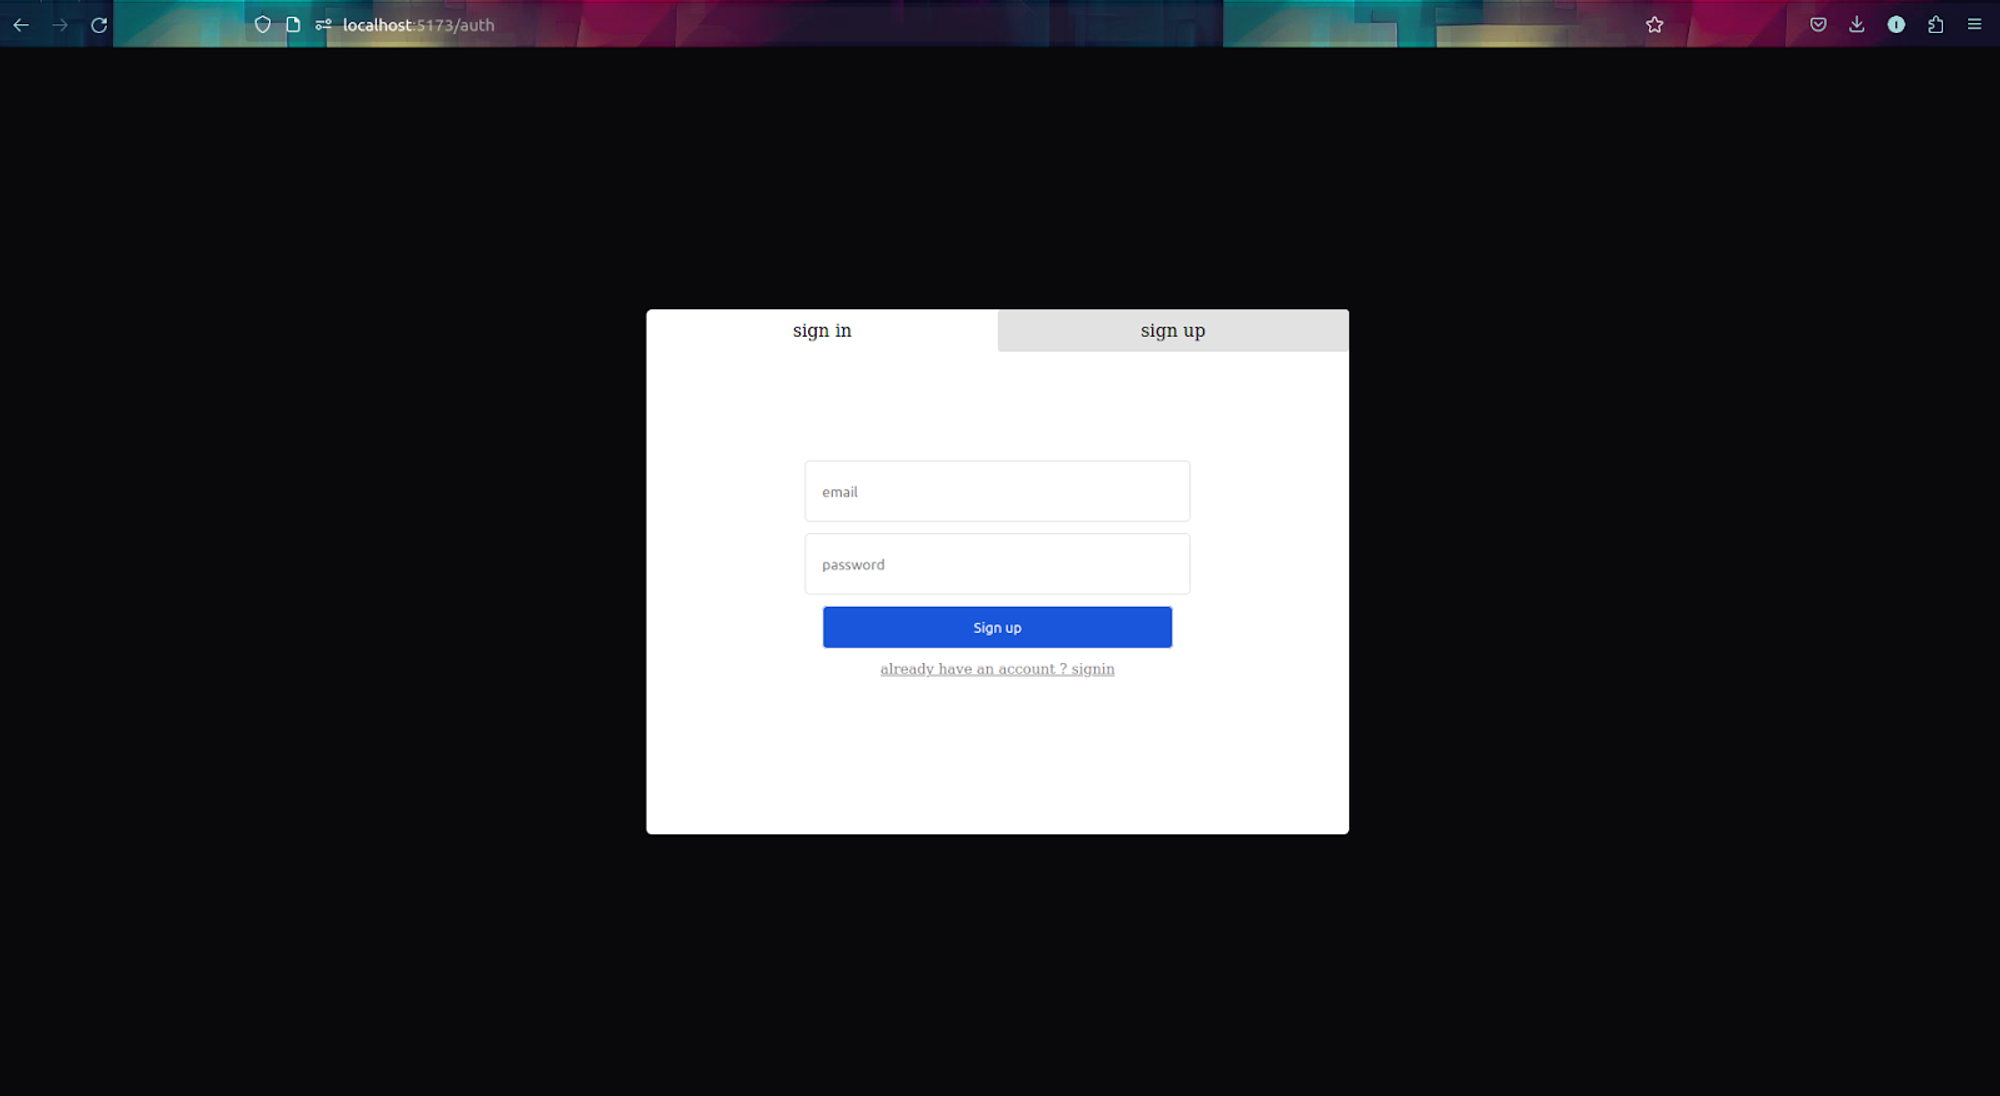
See if users are getting synced into the Permit directory. It should look like this:

Congrats, our Todo Application is fully functional now!
We now have the following permissions in our application:
- By default, all users (authenticated and un-authenticated) can read the todos
- Only admins can create todos
- Only admins can delete todos
- Admins and Employees can edit todos and mark todos as done
Now let’s check out the functionalities :
Currently, we don’t have any admin users, so our first task is to give admin@gmail.com an admin role. To do that:
- Go to the Permit Dashboard > Directory
- Select todo-tenant as the tenant
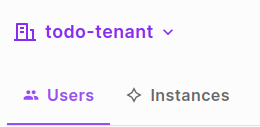
Select edit, remove employee role, and assign admin role

- Save. That’s all we need to do to create an admin user.

Now, let’s see a demo of an Authorized user i.e. admin, trying to create todos:
Here's a demo of an Unauthorized user i.e. employee trying to create todos :
Let’s say we don’t want employees to be able to update our todos. Now, only admins should be able to do that. To change that, go to the policy editor and just check off the required row i.e. update. Now, our employees would not be able to edit or mark the todos as done:

That’s how easy it is to implement RBAC policies with Permit!
We can also go to the Audit Log section in the Permit dashboard and see what users requested for what permissions. Let’s see what our audit Logs look like:

Congrats! By using Permit, you just successfully implemented role-based access control (RBAC) in your React application.
Conclusion
In this tutorial, we explored how to set up and configure Permit to secure the application and control user access based on their roles.
Now that you have implemented RBAC into your application, you can improve your applications' security by leveraging it to real use cases in your application.
What if you want a more granular level of control than user roles but user-detailed identity? For that and more, we recommend you to continue reading our learning materials, such as the difference between RBAC and ABAC, adding ABAC to your application with Permit.
Want to learn more about implementing authorization? Got questions? Reach out to us in our Slack community.
Written by
Arindam Majumder
DevRel @Pieces, Frontend Developer Technical Writer, Content Creator
