Build Authorization Like Google
How Google built its access control with Google Zanzibar, and how you can model and build a 'Google Drive' style authorization system for your app yourself!
- Share:

Loading
2938 Members
Managing permissions in cloud applications can be quite challenging.
In the past, we relied on monolithic frameworks for authorization, but today's world of microservices, edge devices, and various authorization models has changed the game.
In this blog post, we'll discuss how Google tackled this challenge for its enormous suite of services with a system known as Google Zanzibar. Then, we’ll show you how you can model a similar 'Google Drive' style authorization system for your application and build it yourself by using Permit.io. Let’s get into it -
Building Cloud / microservice-based products is a complex endeavor, and building/managing access control for them is even more so.
In the past, we used to build authorization in monolithic frameworks like Django or Spring that came with authorization features baked-in, but these are no longer applicable when dealing with distributed applications. The need to cater to highly distributed microservices, especially when you need to incorporate devices or instances that are deployed at the edge, along with the need to integrate third-party services (Such as billing, authentication, databases, analytics, etc.) and the need for a bunch of different authorization models (e.g., RBAC, ABAC, ReBAC) make this challenge really complex.
We find ourselves not only managing who should access the data but also how it is propagated between different services.
While it is a formidable challenge, there are some best practices and important pitfalls to avoid you can utilize to aid yourself on this quest. Another great way of overcoming this is by looking at other organizations that managed to tackle this problem successfully. A great example of such an organization is Google.
Google's vast and diverse ecosystem encompasses a multitude of distributed applications serving various purposes, including B2B, B2C, and advertising platforms (Think of a YouTuber who manages his own channel, has a specific type of access to a Google Drive based storage through his workplace, and can edit the reviews he posted on Google maps, all using a single identity), poses a significant application-level authorization challenge. With all these applications relying on a single unified identity system, ensuring that users and services have the appropriate permissions and access privileges becomes an almost ridiculously complex endeavor.
Google must balance between security and user convenience, employing robust authorization mechanisms to safeguard sensitive data while ensuring seamless user experiences across its multiple services.
Even if we look at a service like Google Drive, the complexity of handling authorization is readily apparent. Let’s zoom in on it for a sec -
Looking at this single service, Google Drive must cater to an enormous multitude of users, providing each with an extensive and elaborate access control mechanism, defining which users can perform which action on which files and folders based on a wide variety of criteria. Moreover, Google Drive must seamlessly integrate with other Google services and third-party applications, making it imperative to ensure cross-service authorization compatibility.
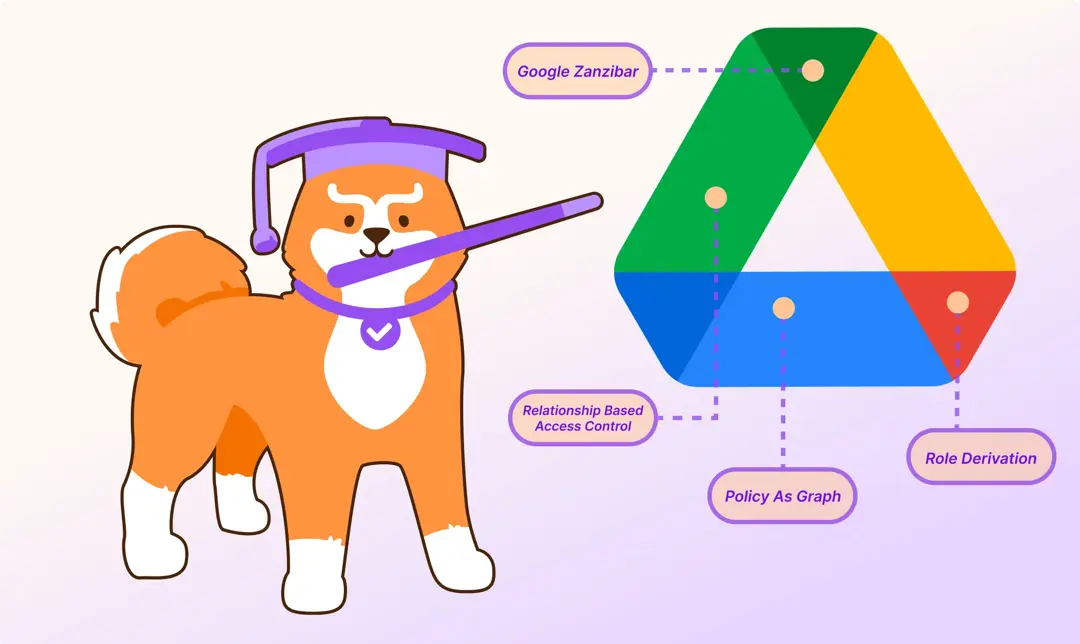
So, how did Google achieve this feat? With the help of Google Zanzibar.
In a white paper published in 2019, Google shared the inner workings of the permissions service they have implemented internally to handle all of their different applications and services.
Renowned for its distributed, scalable, and consistent architecture, Google Zanzibar serves as Google's gatekeeper for access control. Underpinning Zanzibar is a graph data model and a distributed consensus algorithm ensuring consistent authorization decisions across the board.
Google Zanzibar is a graph-based authorization model, meaning it employs a graphical representation to illustrate relationships between users and resources. Graph-based models excel at mapping hierarchies and nested relationships, offering a natural avenue for Relationship based Access Control (ReBAC). Given their ability to manage high volumes of data while maintaining consistency, these systems prove effective in large-scale environments.
While Google never open-sourced its solution, building a Zanzibar-inspired Google Drive style is possible using Permit.io.
This short tutorial explains how you can use Permit to model your own version of Google Drive, including all the powerful access control functionalities Google achieves with Google Zanzibar. The G-Drive permission model is documented here. For simplicity, we will implement a subset of it with Permit. Let’s get into it -
Let’s start with mapping out what the access control requirements of the app we are building need to be:
Object Hierarchy: A Google Drive account can contain many folders and files. Folders can contain other files and folders.
Direct file access: A user can be a Viewer of a file, a Commenter (meaning they can view and comment on the contents), or an Editor (can view, comment, and edit).
Folder-level access: A user can be granted Access to a folder. A user access level on a certain folder will grant that same access level on all the files within the folder.
Account admin access: A user can be granted Admin Access to the entire account, which will grant the highest permission level on all folders and files within the account.
General access to "Everyone in account": Files can be Shared with all the users who are associated with the account that contains the file (share with all account members).
As we can see here, these requirements are composed of both roles (Admin, Commenter, Viewer) and nested hierarchical relationships (Account-Level access provides file-level access).
As we are dealing with nested hierarchical relationships, this is a perfect job for a ReBAC policy.
ReBAC is a policy model focused exclusively on the relationships, or how resources and identities (aka users) are connected to each other and between themselves. It allows us to leverage the existing relationships between application entities to utilize two crucial functionalities:
Resource Roles - To create ReBAC policies, we need to create roles specific to a given resource. This means that the role and the permissions it carries are only relevant in the context of that specific resource. A resource role is formatted as Resource#Role.
In the context of our app, “A user who is assigned the role of an Admin on a folder” will look like this: Folder#Admin.
Role Derivation - Resource roles and entity relationships allow us to derive authorization policies based on existing application-level relationships. Put in the simplest way, it allows us to create a policy like this:
A user who is assigned the role of an Admin on a folder will also get the Admin role on every file within that folder.
The combination of Resource Roles and Role Derivations allows us to derive much more complex and granular roles that are perfectly tailored to handle hierarchies.
Now that we know our prerequisites and the model we are going to use, let’s dive into modeling our app’s authorization using Permit’s UI. Permit allows developers to implement a ReBAC model into any application by using a simple SDK and a low-code UI.
The first step to understanding how ReBAC should be implemented into your application is to visually map out the resources you want to manage access to via relationships. This can be done by putting all your resources (As nodes) and the relationships between them (As edges) on a graph. This should allow you to better visualize the policies you need to create.
In this section, we will map out our Google Drive abstraction structure and then display it on a graph. After that, we would be able to add actual users and instances into the mix. Let’s get started!
As we established, our app requires the following resources, resource roles, and actions:
| Resources: | Actions |
| Account - represents an organization's account in Google Drive. | invite-member, list-members, remove-member |
| Folder | list-files, create-file, rename, delete |
| File | read, comment, update, delete |
Resource Roles:
Account#admin
Account#member
Folder#editor
Folder#commenter
Folder#viewer
File#editor
File#commenter
File#viewer
Let’s set these up in the UI -
Create a Permit account, set up a new organization, and give it whichever name you want.
Go to the ‘Policy Editor’ page, and click on the “Resources” tab
Add our four resources, actions, and, under “ReBAC Options” - resource roles.

Once you set all the resources, actions, and resource roles, you should have something that looks like this:

4. Go to the ‘Policy Editor’ tab, and check the boxes to set up the relevant permissions for each resource role.

A relation is a type of edge in the graph between two resources.
A relation called parent between a File resource and a Folder resource allows you to create relationship tuples of this type between a File instance and a Folder instance.
Note: Repationshop Tuples vs. Role Assignments
Role assignments and relationship tuples are quite similar:
Role assignments create a role relationship between a user and a resource instance.
Relationship tuples create a relationship between two resource instances.
Here are the relationships we need to define:
Folder.account → Account // relation from folder to its parent account
File.account → Account // relation from file to its parent account
Folder.parent → Folder // relation from folder to its parent folder
File.parent → Folder // relation from file to its parent folder
Note: The Direction of Relationships
The direction of a relation is typically from the object resource to the subject resource. However, for relationships, we read the relationship tuple from the subject to the object, in the reverse direction.
To set this up in Permit -
Open the ‘Resources’ tab, and edit the resource to which you want to add relationships.
Under “Relations” set up the relevant relationships via the UI.

Note: The name of the folder > folder relation cannot be the same as the others. In this case, I used “inside” instead of “parent”. You can choose any name by defining a custom relation here:

Now it's time to take advantage of the greatest capability ReBAC gives us - defining role derivations.
To set those up in Permit -
Open the ‘Roles’ tab, and open the role you want to add derivations to.
Under ‘ReBAC Options’, set up the required derivation via the UI (We will need to define one derivation for each folder and account role):

Let’s review everything we set up so far in the form of a graph:
 |
- Resources are denoted by black circles - Resource Roles are denoted by blue circles - Resource Relations are denoted by black edges (or arrows) |
Now that we have everything set up on the Permit side let’s integrate this model into an actual application.
The example offered here uses a Node.JS SDK. SDKs in other languages are available here.
Start by installing the Node.js SDK -
npm install permitio
A full quickstart guide for NodeJS is also available here.
Before we can show how to assign users with direct file access, we need to sync them to Permit. Assuming that you already have a way to get your user details in the application, let’s take the logged-in user and sync it to Permit.
await permit.api.syncUser({
  key: "john@acme.com",
});
In the same way, we’ll create another user named jane@acme.com
2. Now, let's create the file instance:
await permit.api.resourceInstances.create({
  resource: "file",
  key: "2023_report",
  tenant: "default",
});
Folders are created the same way. Let’s create a finance folder:
await permit.api.resourceInstances.create({
 resource: "folder",
  key: "finance",
  tenant: "default",
});
Note: a resource instance must always belong to a tenant so that tenant-boundaries can still be maintained for end-customers. The tenant can be used to signify a completely separate end-customer account on your system.
3. Assigning the viewer role to the user To assign the viewer access to the file, we must create a role assignment object. Let's give John read-only access (i.e. the viewer role) to the 2023_report file:
await permit.api.roleAssignments.assign({
  user: "john@acme.com",
  role: "viewer",
  resource_instance: "file:2023_report",
});
Just like we can give permissions on files, we can do the same on folders. Let's grant Jane the editor role on the finance folder.
Jane can now list-files, create-file and rename the folder, she can't actually access files within the folder. In fact, there are no files in the folder yet. Let's fix that.
To create a relationship tuple, assign the parent relationship from the 2023_report file to the finance folder:
await permit.api.relationshipTuples.create({
  subject: "folder:finance",
  relation: "parent",
  object: "file:2023_report",
});
If a user is granted admin access to the entire account, we want them to receive the highest permission level on all folders and files within the account.
To do that, we need to define an account (We’ll call it Acme) that will be related to our files and folders.
await permit.api.resourceInstances.create({
  resource: "account",
  key: "acme",
  tenant: "default",
});
2. Define the relationship of the account with the folder:
await permit.api.relationshipTuples.create(
    {
        "subject": "account:acme",
        "relation": "account",
        "object": "folder:finance",
    }
)
Do the same for the file.
The last thing we're missing is the ability to give anyone in an account the editor role on a specific file. To do that, we'll add another relation from files to accounts called account_global, and create a role derivation giving any member of the account the editor role on these files.
1. Create the new relation:
await permit.api.resourceRelations.create("file", {
  key: "account_global",
  name: "Account Global",
  subject_resource: "account",
});
2. Add the derived role (note that since we're Patching the editor role, we also specify the existing relations):
await permit.api.resourceRoles.update("file", "editor", {
  granted_to: {
    users_with_role: [
      {
        linked_by_relation: "parent",
        on_resource: "folder",
        role: "editor",
      },
      {
        linked_by_relation: "account_global",
        on_resource: "account",
        role: "member",
      },
    ],
  },
});
Now that we've configured everything and pushed some data, let's do a few permission checks to see what permissions Jane and John have.
First, we'll launch a Policy Decision Point (PDP). The PDP is a small container that fetches policy and data from Permit's cloud service and has all it needs to make decisions locally.
docker run -it \
    -e PDP_API_KEY=$permit_sdk_api_key \
    -p 7766:7000 \
    -p 8081:8081 \
    permitio/pdp-v2:latest
Let's first see if John can read the 2023_report file:
await permit.check(
  // user
  "john@acme.com",
  // action
  "read",
  // resource
  {
    type: "file",
    key: "2023_report",
  }
);
We get back a true result, meaning that John can read the file. Can he update it?
await permit.check(
  // user
  "john@acme.com",
  // action
  "update",
  // resource
  {
    type: "file",
    key: "2023_report",
  }
);
We get back a false result, meaning that John cannot update the file. That's because he only has viewer permissions on the file.
Can Jane update the file?
await permit.check(
  // user
  "jane@acme.com",
  // action
  "read",
  // resource
  {
    type: "file",
    key: "2023_report",
  }
);
Yes! Jane can update the file because she has editor permissions on the finance folder, and those permissions propagate through the derived role.
In conclusion, building your own 'Google Drive' style authorization system is a complex yet achievable endeavor. By drawing inspiration from Google's Zanzibar and harnessing the power of Permit, you can empower your applications with robust access control mechanisms. The challenges posed by distributed architectures, edge devices, and diverse authorization models can be met head-on with the right tools and knowledge.
Got questions? Want to learn more about Authorization? Join our Slack community, where there are hundreds of devs building and implementing authorization.

Application authorization enthusiast with years of experience as a customer engineer, technical writing, and open-source community advocacy. Comunity Manager, Dev. Convention Extrovert and Meme Enthusiast.


